[8 Fixes] My Toshiba TV Has No Sound
If you’re already facing a problem with Toshiba’s no-sound issue, then it’s quite clear that there’s a burning question in your mind — Why my Toshiba TV has no sound?
Well, it’s a very common issue among Toshiba users.
They claim that the majority of it can occur whether you’re using an internal TV speaker or an external sound box, and it can have a variety of causes related to the TV settings, hardware, cables, etc.
There’s nothing to worry about. Here, we’ll suggest how you may identify and resolve your Toshiba TV no-sound issue.

Reasons Why My Toshiba TV Has No Sound
The absence of sound on your Toshiba TV could be caused by a variety of factors.
- For some users, only one channel or app on their Toshiba TV has sound.
- Alternatively, many channels or apps have the sound turned off.
- Sometimes, the problem appears after watching TV for an hour or more.
If there is no sound but you can still see images on your Toshiba TV, there is a hardware problem.
- It’s possible that the issue is related to the TV settings.
- A cable or TV connection issue that is defective or loose.
- Or the sound settings are turned off.
Moreover, damaged audio ports or built-in speakers could be another factor. A defective audio IC is typically to blame for this. They frequently fail because of their propensity to overheat quickly.
How to Solve the Sound Issue on Toshiba TV
If you want to overcome this issue, you need to perform some special methods. Some efficient methods are —
1. Perform Hard Reset
Sometimes a hard reset is so effective to get rid of specific technical problems. So, if you want a hard reset then follow the steps accordingly —
Step 1: Unplug the TV cord from the socket.
Step 2: Wait for a while, at least one minute.
Step 3: Now, press and hold down the power button for a minimum of 30 seconds.
Step 4: Replug the TV cord into the socket.
2. Configure TV Setting
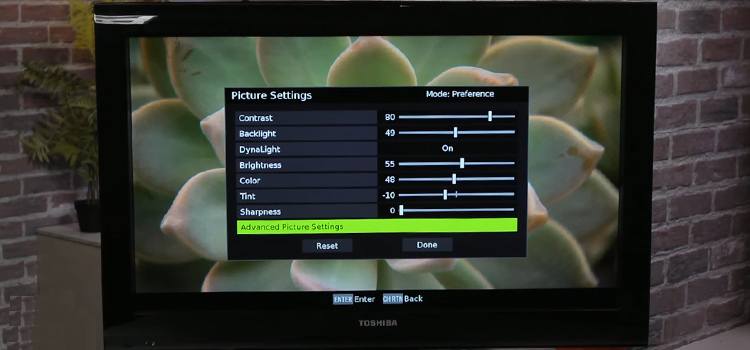
Inaccurate sound configurations may be a problem. You might have enabled certain options that are causing the problem in an effort to find the ideal sound settings for your Toshiba TV.
In this case, you’ve to turn off the DTS TruSurround. To do so —
Step 1: Go to the Settings.
Step 2: Choose Display & Sounds.
Step 3: Now, go for the Sound Settings.
Step 4: Click on the Advanced Settings option
Step 5: Turn off the DTS TruSurround by clicking it.
3. Disconnect External Devices
When you plug an audio source into your TV, such as a speaker or headset, the integrated soundbar normally stops working.
Check your output ports for any linked devices along with any wirelessly connected devices as well.
Disconnect them all to see whether the audio works again.
4. Check The Cables
If there is a problem with the cables, it can interfere with the TV’s ability to receive audio data.
Ensure that the HDMI cable is properly connected to your TV and the source device. Also, check for the Audio/Video cable you’re using is plugged into the right port. After that, look over the wires for any cuts or damage.
You can also clean the temporary memory in case to assuring it doesn’t occur the problem. To do so, unplug all the cords, wait for a minute, and then plug them back in.
Finally, check to see if you have an S-video cable connecting you as well. You’ll need a different audio cable if you want to receive audio because these cables only support video transmissions.
5. Change Audio Output
If there’s any possibility that the audio output is causing this problem, then you need to change it.
Step 1: First, open the Settings menu.
Step 2: Choose Display & Sound.
Step 3: Click on Audio Output.
Step 4: Go for Digital Audio Format.
Step 5: Now, select PCM (Pulse Code Modulation) to change the option.
6. Use Internal Speakers
The issue can arise if you accidentally turned off the built-in speakers on your Toshiba TV, which features a switch to turn them on or off. To turn it on —
Step 1: Access the Main menu.
Step 2: Choose Audio from the menu.
Step 3: Select Speakers, then turn it on.
7. Update Toshiba TV Firmware
There are two feasible ways to update the Toshiba TV firmware. Apply the one that goes with you.
First one,
Verify that your TV has an internet connection.
Step 1: Go to Settings.
Step 2: Choose Device & Software.
Step 3: Click on About.
Step 4: Go for Install System Update.
Another one,
Step 1: Go to Settings.
Step 2: Select More.
Step 3: Click on Software Upgrade.
Step 4: Now, go for Scan for an upgrade.
Step 5: If there is an update available, go ahead and download it.
8. Perform Factory Reset
Here are also two efficient ways to do it.
First one,
Step 1: Search the Menu or More button on the TV panel.
Step 2: Press and hold the button for a while to bring up the Restore settings.
Step 3: Follow the on-screen instructions to finish the reset process.
The other one,
Step 1: Press the Home or Menu button on the remote.
Step 2: Afterward, locate the Device and software in Settings.
Step 3: Then go for the Reset to factory defaults.
Step 4: Finally, to confirm, click Yes.
Conclusion
Don’t worry if you’re also facing this problem. A lot of people are facing this all over the world. But as you’ve read this article this far, hopefully, you’ve got the necessary idea to solve your sound absence problem.
Subscribe to our newsletter
& plug into
the world of technology


