How To Overclock AMD FX 8350 Black Edition? | Effective Guidelines
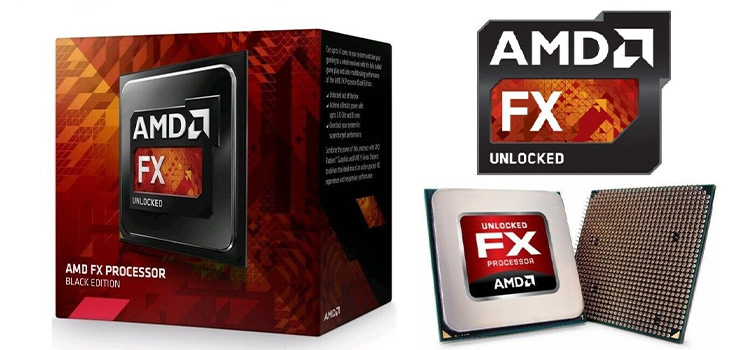
To overclock AMD FX 8350 Black Edition, enter BIOS mode to change the CPU ratio, CPU/NB (Northbridge) frequency, power control, CPU voltage, and other parameters to run your processor at its maximum capacity. Make sure to monitor the temperature and use stress test software to check if the system is stable under full load conditions.

Can Really AMD FX 8350 Be Overclocked?
Yes, the AMD FX 8350 Black Edition processor is overclockable up to 4.8 GHz. However, overclocking needs additional cooling and poses potential risks. There are some obvious risks involved with overclocking, such as voiding the warranty whenever you run a processor outside of the manufacturer’s specifications.
Additionally, there’s a possibility of premature failure and lowering of the CPU’s lifespan if you overclock incorrectly.
What Is the Effect of Overclocking AMD FX 8350 Black?
AMD FX 8350 Black Edition Processor features AMD’s next-generation architecture with 8-core processing, older yet powerful CPU. They are performing with significantly better frame rates for some of the most demanding games at sensational resolutions.
However, overclocking it to push to the maximum potential is possible with liquid cooling, even further around 4.8 GHz. You got to have a different cooling system as AMD stock coolers can’t handle the temperatures of CPU speed over 4.4 GHz.
How Do I Overclock My AMD FX 8350 Black Edition?
Before you try overclocking your processor to its fullest potential, make sure you got an essential cooling setup and a motherboard powerful enough to withstand the capacity of the overclocked processor. Follow the steps below to overclock your AMD FX8350 without any hassle.
Step 1. Essential Software
You need to install some important programs to test your computer’s stability. There are many stress test software and benchmark runners to push the processor limit. Install 3D Mark or Heaven DX11 Benchmark to stress test your CPU and GPU simultaneously.
You can also download CPU-Z, Speccy, HWiNFO (32/64), or AIDA64 for information about the CPU, mainboard, memory, and GPU. The core speed and core voltage would be the primary monitoring interest.
HWMonitor, SolarWinds Server & Application Monitor, Paessler PRTG Network Monitor, Atera, HWiNFO, ManageEngine OpManager, AIDA64, and SysGauge are some of the best software for monitoring the system sensors, to monitor the voltages, temperatures, and fan speeds.
For stress testing, you can use Prime95, OCCT, HeavyLoad, GtkStressTesting, 3C Toolbox, or LinX to ensure that your overclocking settings are stable.
Step 2. Enter BIOS Mode
To begin the overclocking procedure, you need to restart your computer to enter BIOS mode. The key to enter the BIOS mode depends on the motherboard you’re using. For MSI motherboards, pressing the “Delete” key while the system is booting up takes to the BIOS.
Spamming the F2 button may take you to the BIOS setup. You may also see a message similar to “Press Del to enter SETUP,” which usually flashes by quickly on any motherboard. However, you can find your BIOS key easily by searching your brand on the internet.
Step 3. Advanced Tab
There should be a tab called “Extreme Tweaker” selected by default. In the “Advanced Tab” select “CPU Configuration” Enable the Core C6 State and keep the “Apm Master Mode” to Auto. Disable the rest of the options. Set the “AI Overclock Tuner” to Manual.
Step 4. Change the CPU Ratio
Next, change the CPU Ratio to “20”. Keep the AMD Turbo Core technology to “Disabled“ and set the CPU Bus Frequency and PCIe Frequency at “Auto”. Make sure to set the memory frequency according to the type of memory that you are using.
After setting the CPU ratio, set the CPU/NB (Northbridge) Frequency to 2200 MHz. Update HT (HyperTransport) Link Speed to 2600 MHz.
Step 5. Xtreme Tweaking
Enable the ‘Xtreme Tweaking’ and set the PCIe spread spectrum to auto. Disable CPU spread spectrum and EPU power saving mode.
Step 6. Power Control and CPU Voltage
Moving down, go to the Digi VRM/ Power Control option to set the CPU Load Line Calibration setting. This option depends on your motherboard and power supply configuration. For a high-spec motherboard and PSU with a gold rating, set this option to Ultra. This option depends on your motherboard and power supply configuration.
Set the CPU/NB Load Lineto “High“. Update both CPU Voltage Over-Current Protection and CPU/NB Voltage Over-Current Protection to 130%. Leave the last settings as they are.
In the Xtreme Tweaker tab, move all the way down to the CPU & CPU/NB Voltage tab and change the CPU Manual Voltage from Auto to 1.37V or 1.38V. Change CPU/NB Voltage to 1.17V or 1.20V.
Step 7. CPU Bus Frequency
Finally, change the “CPU Bus Frequency” from Auto to 220. The Target CPU Speed on the top right corner will automatically change to 4400MHz. However, changing CPU Bus Frequency might change the values of other values automatically. Change the values manually to revert back to the desired values.
Step 8. Stress Test and Benchmark
After changing the settings, restart your PC and open any stress test software to simulate the changes when the CPU gets under full load. Check if the core voltage or frequency remains stable, as well as the CPU temperature.
FAQs (Frequently Asked Questions)
Is the AMD FX 8350 Black Good For Gaming When Overclocked?
AMD FX 8350 is pretty decent for gaming in 2021. The processor still can run the latest games and makes a good combo with GTX 1650, GTX 1060, RX 5500, etc. The processor features enough cores and comes with a great budget-friendly combo, making it an appreciable choice for gamers.
Does AMD FX 8350 Run Hot?
The FX8350 does run quite hot and needs a powerful CPU Cooler to maintain its Maximum Operating Temperature of 61c. Above 61c, your processor will throttle or slow down to keep the temperature at 61c or lower. Pushing the CPU continuously may lead to permanent damage.
To Conclude
Overclocking any components comes with a potential risk of overheating and other issues. Make sure to install a powerful cooling setup before you plan to overclock your CPU. While changing the values such as CPU bus frequency, move your way up in small increments rather than putting higher values at once.
Subscribe to our newsletter
& plug into
the world of technology


