Best Screenshot App for Windows | Top 4 Screenshot Apps
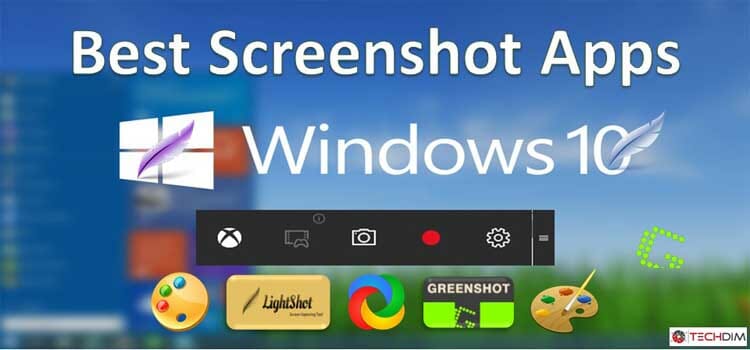
Your PC’s ‘PrtSc’ key is not working? Or simply annoyed with taking screenshots with ‘PrtSc’? In windows, there are many screen capture apps for you. These apps allow you to take screenshots in different ways, customize and edit taken screenshots. In this article, I will discuss some best screenshot app for windows and yes, I will suggest the best one for you!
PicPick
PicPick is a widely used app to take the screenshot of windows. The most interesting thing about PicPick is it allows you to take screenshots in 7 different ways and you can set up how you want to take screenshots. It is totally free for you. You can customize and edit your taken screenshot in its build in an image editor. I think this is the best screenshot app for windows.
Features of PicPick
- You can take a screenshot of your entire screen, active windows or a portion.
- It allows you to crop, resize or rotate taken screenshots.
- You can add various effects to your screenshots like color balance, blur, sharper, brightness adjustment etc.
- You can customize your screenshots with arrows, texts and much more with its build-in editor.
- You can upload your taken screenshot instantly to an FTP server.
- You can set up the hotkeys for taking screenshots.
How to use PicPick
- Go to this Website and click download option in the navigation bar at the top of the webpage. There you can find an option ‘For Home Users’. Download this version. It is totally free. After completing the download, install PicPick.

- After installation completed, click Hot Keys button in the navigation bar. There you can find options to set up your keyboard shortcuts for the different type of screenshots like Capture active window, fixed region etc.

- Click on the Capture button and select what you want to be done after a screenshot is taken. You can just save it to your PC or Upload to Facebook, Twitter or FTP server. If you want to be uploaded to FTP server click FTP and give your server address. You can set up the saving directory on your PC, just click Autosave.
- After all this setup being completed, you will see an icon of PicPick in your taskbar. When you want to take a screenshot, just click on this icon and select your desired option.

LightShot
LightShot is also a frequently used app to take the screenshot of windows. What makes it special is its online gallery. Lightshot keeps track of all your taken screenshots and you can find them by logging in Here. It has a powerful built-in image editor that allows you to edit and modify your screenshots. You can easily take screenshots and from my experience, it’s really much easier than other screenshot apps.
I myself use this app and I am a great fan of it. The coolest thing is the screenshot captured by Lightshot is very tiny in size but it does not compromise with the image quality. From that context, Light is the best screenshot app for windows.
Features of LightShot:
- You can share your screenshots via internet instantly. Just snap your screenshot and give lightshot the link where you want to share it.
- You can see all your taken screenshots and if you want, you can edit or delete them. Just go here and create an account.
- You can copy a screenshot to the clipboard and paste it anywhere you want like Photoshop, Microsoft Word etc. Just click Ctrl+C button while taking screenshots.
- You can edit your taken screenshot immediately after taking it with lightshot’s Pixlr editor. You can add an effect like blur, sharpen etc. It has pen and brush tools in case you want to highlight your screenshot.
- You can add texts to screenshots.
How to use LightShot
- Go to this Website and download LightShot. You will find options ‘Download For Windows’. Click and download. It’s totally free. After completing the download, install LightShot by clicking on the downloaded Setup file.

- Search LightShot in your PC’s search bar or you can make a shortcut of lightshot in the desktop. The easier way is when you want to take a screenshot, click Prtsc(Print screen) button and lightshot will appear. You will see a shaded region and you can change the area of the region as you want. Then you will find options to save, print or edit the image. You can upload the image to lightshot sever or share it via the internet. To copy the image to clipboard, click Ctrl+C button.

- You can use lightshot as a plugin in Firefox, chrome, internet explorer and opera. Just go to your browser and search ‘lightshot’ in plugin option. After adding the plugin into your browser, you can take screenshots of web pages there. But if you want to take a screenshot other than webpages, you must have to install lightshot full version on your PC.
ShareX
ShareX is an amazing app to take screenshots of windows. You can capture both screen image and videos with ShareX. It has the editing facility and gives you the chance to customize your screenshots.
Features of ShareX:
- You can capture full screen, active window, active monitor, region.
- You can capture text and make GIF(screen record with it)
- It’s totally free of cost and ad-free.
- You can share your image via internet.
- You can edit and add effects to your taken screenshots.
How to use ShareX:
- Download ShareX from Here and install the downloaded setup file.
- Search ShareX in your PC’s search bar and open it. You will find many options like capture, Upload, Tools.

- You will find edit option under Tool in the navigation bar.
That’s all, now ShareX is ready for you.
Greenshot
Another user-friendly screenshot taker for windows. It is too simple and lightweight, but it has amazing features. It is a great choice for older computers and laptops as it takes only 20MB memory RAM when idling.
Features of Greenshot
- Easy to use.
- You can capture various regions of your screen.
- Edit and upload take screenshots via Internets.
How to use Greenshot:
- Download Greenshot from here and install the downloaded setup file.

- You can find it searching in your PC’s search bar. Open it and you will find options to capture, edit and upload your screenshots.

- Very simple, isn’t it? If you use it, I can assure you, you won’t be disappointed.
If you are a windows user then this post may be helpful for you. How to capture screenshot in windows 10 .
There are many awesome apps to take screenshots of windows. But if have to tell the best one, from my experience, I will suggest you use PicPick. It has both free and paid versions. It’s a complete package for you. What do you want to do with your screenshots? PicPick can do all most everything for you. If you have not used it yet, why don’t give a try today!
Subscribe to our newsletter
& plug into
the world of technology

