[6 Fixes] System Thread Exception Not Handled iaStor.sys
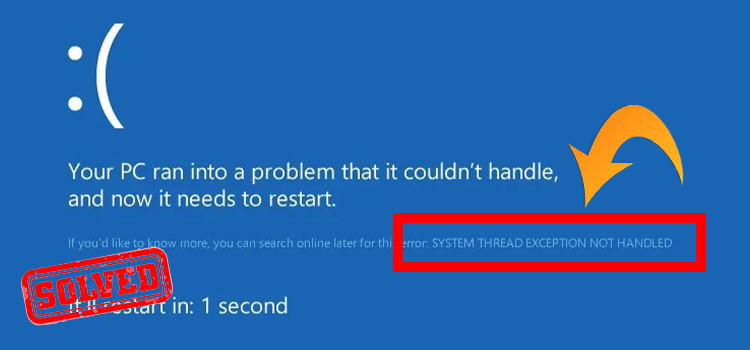
When you have encountered “SYSTEM THREAD EXCEPTION NOT HANDLED” error, it can get tricky. Because it’s a bit more difficult to fix than other BSOD (blue screen of death) errors. The main reason for this error is an incompatible or outdated driver.
To fix this, first, you should try to find out which driver is causing the problem. But since multiple drivers can cause this, it can get a bit tricky. Read on to find out how to fix it.

Why the ‘System Thread Exception Not Handled iaStor.sys’ Error Occurs?
System Thread Exception Not Handled error mainly appears because of faulty or incompatible drivers. You can easily find the driver that caused the error by reading the end of the error code.
The error code will show “System Thread Exception Not Handled (DRIVER_NAME.sys). Here the DRIVER_NAME varies for most users.
Here are the signs for specific faulty drivers:
- atikmdag.sys – AMD Display Graphics Driver
- ATI2DVAG.sys – AMD Display Graphics Driver
- ATI2CQAG.dll – AMD Display Graphics Driver
- ATIVPK.sys – AMD Display Graphics Drive
- AMD2DVAG.sys – AMD Display Graphics Driver
- AMDKMDAG.sys – AMD Display Graphics Driver
- AMDVPK.sys – AMD Display Graphics Driver
- iaStorA.sys – Intel Rapid Storage Technology Driver – x64
- wificlass.sys – Cisco Wireless Access Points
As you are seeing iaStorA.sys on the end of the error, it is an indication that the Intel Rapid Storage Technology Driver – x64 is outdated or faulty.
How to Fix ‘System Thread Exception Not Handled’ Error
Intel RST (Rapid Storage Technology) driver improves the performance and reliability of systems that is using SATA disks to store data. If the RST driver is incompatible, then the service will be stopped and you’ll face the BSOD error on your computer.
Follow the methods below to fix the error.
Solution 1: Boot into Safe Mode
The first thing you need to do after encountering the BSOD error is boot into safe mode.
Note:
- If your computer can load the operating system, then follow the 1st method below.
- If you can only go to the Sign-in screen, then skip the 1st method and follow the 2nd method below.
- If you are unable to load the operating system then skip the 1st and 2nd methods and follow the 3rd method below.
Method 1: Boot Into Safe Mode Via Settings
Step 1: Click on the Windows icon, then select Settings.

Step 2: Navigate to Update & Security then click on Recovery.

Step 3: Click on Restart now under Advanced startup.

Step 4: When your PC restarts, follow the navigation below from the options screen.
Troubleshoot > Advanced options > Startup Settings and click Restart.
Step 5: When your PC reboots, press F6 to boot your computer in Safe Mode with Command Prompt.

Step 6: Run the following commands in the command prompt and hit Enter after each command:
c:
cd windows\system32\drivers
ren iaStorA.sys iaStorA.old
Step 7: Close the command prompt and Reboot.
After this, your computer will boot successfully without any errors.
Method 2: Boot into Safe Mode from the Sign-In Screen
Step 1: Simply hold down the Shift key and click on Restart under the Power button.
Step 2: Follow the rest from step 3 in the first method.
Method 3: Boot into Safe Mode from a Blank Screen
Step 1: Press and hold down the power button on your computer for 10 seconds to turn it off.
Step 2: Once the computer turns off, press the power button again to boot it.
Step 3: As soon as your PC starts press and hold the power button again for 10 seconds.
Step 4: Again, press the power button to start your computer.
Step 5: After repeating this process correctly, your computer will boot into the Windows Recovery Environment.
Step 6: Now, follow the rest from step 3 in the first method.
Solution 2: Run DISM and SFC Scan
If the above method doesn’t fix the error, then open the command prompt as shown in the previous solution and type the commands below:
Note: Don’t forget to hit Enter after each command.
- DISM /Online /Cleanup-Image /ScanHealth
- DISM /Online /Cleanup-image /RestoreHealth
- sfc /scannow
Now restart your computer and check if the error is resolved or not.
Solution 3: Reinstall Intel RST Driver
Once your computer boot successfully, you need to follow the steps below:
Step 1: Press the Win key and the X key simultaneously to open WinX Menu and select Device Manager from the list.

Step 2: Click to expand the Disk drives in the Device Manager window, right-click your Intel Rapid Storage Technology supporting platform and then choose Uninstall device.

Step 3: Go to the Intel Download website. Type Intel Rapid in the search box and then choose Intel® Rapid Storage Technology Driver from the result.

Step 4: Click Download under SetupRST.exe. Once the download is complete, double-click the SetupRST.exe file to install the driver on your operating system and reboot your computer.
If this doesn’t fix the issue, then try the next solution below.
Solution 4: Start the Intel RST Service from Task Manager
After booting successfully into your operating system, follow the steps below:
Step 1: Press the Win key and the X key simultaneously and choose Task Manager.

Step 2: Click on the Services tab and find Intel Rapid Storage Technology in the list.
Step 3: Check if it is running or not, if not, right-click it and then choose Start.

Step 4: Close the Task Manager and reboot your computer.
After this, the issue should be resolved. But if you see the service is running, then follow the next solution below.
Solution 5: Change the Startup Status
If the System Thread Exception Not Handled iaStor.sys error still appears, then you need to change the startup status in the following way:
Step 1: Press the Win + R keys simultaneously to open the Run box, type services.msc in the box, and then hit Enter.
Step 2: Find Intel Rapid Storage Technology in the list and then double-click it to open its Properties.
Step 3: Under the General tab, change the Startup type from Automatic (Delayed Start) to Automatic. Click Apply and OK to save changes.

Step 4: Finally, reboot your PC to see whether the problem is fixed or not.
Solution 6: System Restore
If none of the above methods help you fix the System Thread Exception Not Handled error, then you need to use System Restore to restore your computer. Follow the steps below to perform a system restore on your computer.
- Open Control Panel, select “View by” – Small icon, and click Recovery.

- Then, click on Open System Restore.

- Now, click on Next and select a restore point from the list.
- Finally, click on Finish.
Frequently Asked Questions (FAQs)
What Is iastor.sys?
.sys indicates the System files. The iaStorA.sys is a system file which is known as the Intel RST (Rapid Storage Technology) file. If you see the System Thread Exception Not Handled error following this “iaStorA.sys” error code, it means the Intel RST driver is corrupted or incompatible with your operating system.
What Does It Mean When It Says System Thread Exception Not Handled?
The System Thread Exception Not Handled means the system thread generated an exception that the error handler didn’t catch most of them are caused by incompatible or outdated drivers, conflicting memory, third-party applications, IRQ, and faulty system files.
Conclusion
System Thread Exception Not Handled error has many different reasons and the mostly the reason is marked at the end of the error under the first bracket. As you’ve faced the error System Thread Exception Not Handled (iaStor.sys), the iaStor indicates the Intel Rapid Storage Technology (RST) driver which is causing this error. All the possible solutions for the mentioned error have given above in this article. So, don’t forget to let us know in the comment section below about the solution that you will have resolved the error.
Subscribe to our newsletter
& plug into
the world of technology


