[2 Fixes] Oregon Scientific Projection Clock Not Projecting
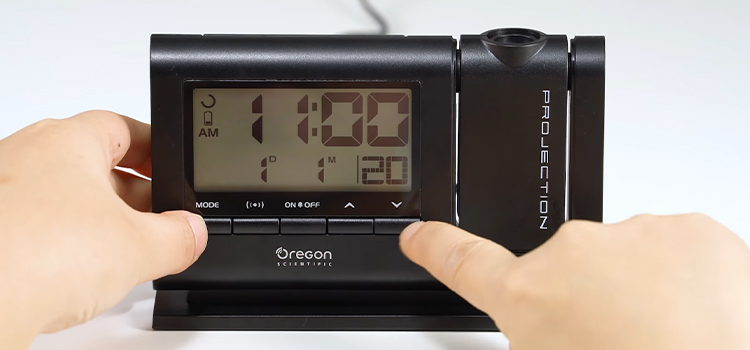
The Oregon Scientific Projection clock has a feature for projecting an image. This means you can see the projection image of the clock including time and outdoor temperature on the wall or ceiling.
Since each model of the Oregon projection clock is designed differently, the methods of image projection are different for different models. If your Oregon Scientific projection clock is not projecting images on the wall or ceiling, then don’t worry, you are not alone.
In this article, we will show you how you can fix projection image issues with your projection clock using some simple tricks. So, without any further ado, let’s solve the issue.

Why Oregon Scientific Projection Clock Not Projecting?
There can be several reasons why your Oregon Scientific Projection clock is not projecting. It can happen if you haven’t activated the projection.
Also, the function won’t work even after activating it unless you connect the AC/ DC adapter that is supplied with the projection clock.
Let’s see how you can allow your Oregon scientific projection clock to display on the wall.
How to Enable Projection Unit on Oregon Scientific Projection Clock?
To let the projection unit function work on your Oregon scientific projection clock, you need to connect the AC / DC adapter to the device. Follow the steps below to allow the clock to project the time and temperature:
Step 1: Connect AC Adaptor
A 4.5V AC / DC adapter is supplied with your main unit.
- First, you need to plug the adapter into the AC outlet.
- Then, remove the battery cover from the back side of the clock and you’ll see the AC / DC port to the left of the batteries and the reset hole.

- Now, plug the AC / DC adapter into the port on your projection clock while running the wire of the adapter through the small wire socket below the port.

Step 2: Activate the Projection Unit
To activate the projection unit, you need to slide the PROJECTION switch to ON. If this won’t start the projection, then press the SNOOZE or LIGHT button for 8 seconds until the clock starts projecting both the date and outdoor temperature.
If this won’t project time and temperature, then follow the instructions from the next segment below in this article.
How to Fix the ‘Oregon Scientific Projection Clock Not Projecting’ Issue
Follow the solutions below one by one until your Oregon scientific projection clock starts projecting:
Fix 1: Replace the Batteries of the Oregon Scientific Projection Clock
You may face issues with projection due to dead batteries. If this is the case, you need to replace the batteries from the projection clock.
- First, remove the battery compartment cover from the back of the clock.
- Then, pull out the plastic strip from the battery compartment.
- Now, remove the old batteries and insert three UM-3 (AA) 1.5V batteries.
Caution:
- Do not use rechargeable batteries.
- You are recommended to use alkaline batteries for longer performance.
- Perform a RESET after changing batteries.
Fix 2: Reset the Oregon Scientific Projection Clock
Follow the steps below to reset the main unit of the Oregon Scientific Projection Clock:
- Remove the battery compartment cover and the reset button is located on the left side of the batteries.
- Now, take a paper clip and insert it into the reset hole to press the reset button.
- After pressing the reset button correctly, the clock will reset.
After resetting the main unit successfully, repeat the projection activation process described above again, and this time the Oregon Scientific Projection Clock will start projecting.
If the issue isn’t resolved, then visit the official website of Oregon to seek customer support for your device.
Frequently Asked Questions (FAQs)
How Do I Reset My Projection Alarm Clock?
If your projection clock uses batteries only, then press and hold the SNOOZE / LIGHT button for 3 seconds. If the display of the clock appears distorted, then you need to press the reset button. The reset button is located inside the battery compartment of a projection alarm clock.
How Do I Adjust the Focus of the Projection Beam on an Oregon Scientific clock?
First, rotate the projection arm to aim at the wall. Once the time is projected, rotate the focus dial towards the side of the projection arm until you can read the time easily. If the projection is still blurry, try cleaning the projection lens.
How Do I Turn on A Projection Clock?
Normally, a projection clock turns on after inserting the batteries. If your projection clock won’t turn on after inserting the batteries, check if the batteries are fully charged or not. If the batteries are dead, replace the batteries to turn on the projection clock. After inserting the batteries, it usually takes 3 to 7 minutes to adjust time as it receives the radio signal and adjusts time, date, day, and temperature accordingly.
Conclusion
Many Projection Clock users face projecting problems with the Oregon Scientific Projection Clock as they just try to enable the projection using the DC power or using the batteries. But the projection doesn’t work without the supplied adapter. Just connect the adapter and enable the projection as instructed above to fix this issue. Hopefully, now you can enjoy the projection with your Oregon Scientific Projection Clock after reading this article. Thanks for reading.
Subscribe to our newsletter
& plug into
the world of technology


