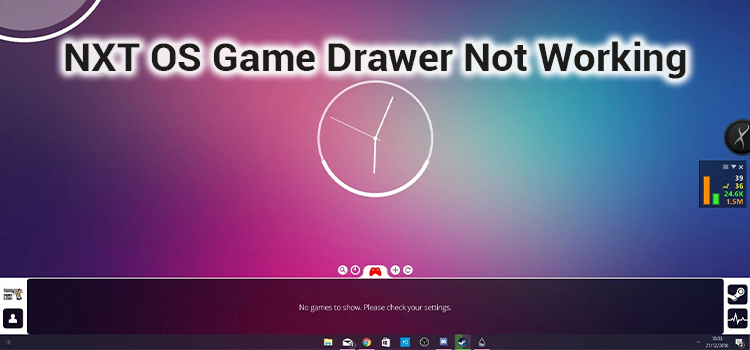
[Fix] NXT OS Game Drawer Not Working (100% Working)
NXT-OS is popular and is being used by many people around because of its customizable features and futuristic interface. The game drawer of this OS helps to find games faster as everything is put in one place here. You can launch and retrieve games automatically on your computer using the game drawer.
However, in the game drawer of your NXT-OS isn’t working then don’t worry, you are not alone in who is facing this for the first time. Many NXT-OS users already have complained that their game drawer stopped working and luckily, they also have fixed the issue with some simple steps.
So, let’s explore the solution to fix this issue below.

Why NXT OS Game Drawer Is Not Working?
The game drawer of the NXT-OS doesn’t show games or doesn’t work because of the steam bug or a corrupted main file of the app. Solutions to both reasons behind this problem are given below in this article. So, let’s apply them to your computer.
How to Fix NXT OS Game Drawer Not Working Issue?
As you know that either a steam bug or a damaged file triggers the above-mentioned issue on your computer. Here are the solutions to both issues:
Solution 1: Restart the Game Drawer
If the game drawer isn’t working because of a bug, then you can try restarting it to check if the games are showing or not. Many NXT-OS users have fixed the game drawer only by restarting it.
To restart the Game Drawer, exit it from the taskbar on the bottom right of your screen and relaunch it. Now check if the issue is resolved or not. If not, then try the next method below.
Solution 2: Fix the Corrupted File
If the previous method doesn’t work for you, then the main file of the game drawer is corrupted and it needs to modify. Fortunately, you don’t need to modify the file manually. Just follow the instruction below and the issue will be solved in minutes.
Method 1: Download the modified file and replace it
- Download the modified file named “Steam.lau” from this GitHub link.
- Then, Extract the downloaded file (Steam.lua).
- Now, open a new window (for example, right-click on D drive and click “Open in new window”).
- Then go to the path where you’ve installed NXT-OS. The default path for the original NXT-OS file is:
Documents > Rainmeter > Skins > NXT-OS > GameDrawer > Resources > Scripts
- Now, drag and drop the extracted “Steam.lua” file here.
- When the confirmation prompt appears on your screen about replacing the file in the destination, click “Yes”.
- Finally, restart the game drawer and the issue will be solved.
Method 2: Modify the main file of NXT OS
- Navigate to the path where you’ve installed NXT-OS. The default path for the original NXT-OS file is:
Documents > Rainmeter > Skins > NXT-OS > GameDrawer > Resources > Scripts
- Then, find a file named “Steam.lua” and open it with the notepad.
- Now, go to this direct link and copy the codes.
- Then, come back to the notepad, select all codes and paste the copied codes.
- Press Ctrl + S to save it and close the notepad.
- Now launch the game drawer and hopefully, it will work fine this time.
Frequently Asked Questions
What to Do If NXT OS Game Drawer Doesn’t Display Games?
If the NXT Game Drawer doesn’t display games, then the main file named Steam.lua is corrupted and damaged. You need to replace or modify it. Detailed instructions on how you can replace or modify the corrupted file are given above in this article. So, you can apply them to fix the issue with the game drawer.
How do I Modify the Steam.lua file?
You don’t need to be a programmer to reprogram the steam.lua file on the NXT-OS to fix the game drawer issue. You just need to open the steam.lua file with notepad and delete all the coding. Then you need to paste the modified code there and save the file. You can get the modified code of that file from this Pastebin link.
Conclusion
We hope you can now fix the NXT-OS Game Drawer issue with help of our provided solution. If the issue is fixed after restarting the program, then you may need to restart it each time you face this problem. But replacing the main file will solve the issue permanently. If you have found any other solution to this issue, then feel free to share it with us in the comment section below.
Subscribe to our newsletter
& plug into
the world of technology


I have an Issue with Battle.net Games not. Being Detected and or not loading/Downloading a banner.