How to Turn Off PCM on Yamaha Receiver?
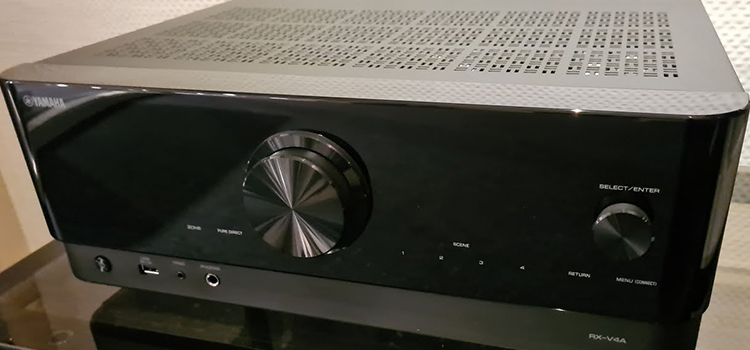
The Yamaha receiver generally shows Dolby or DTS HD on its display. But if you see that your Yamaha receiver suddenly displays ‘PCM’ and you cannot change the PCM mode, then don’t worry, you are not alone in facing the problem for the first time.
Many users have reported that their Yamaha receiver never stops displaying PCM on the display of the device. For this reason, we have discussed the PCM on the Yamaha receiver and pointed out some ways to fix the problem in this article.
So, without further ado, let’s solve the issue.

What Is PCM?
Before solving the issue, you need to know what PCM is. PCM stands for Pulse Code Modulation. This is a method used by CDs and DVDs to transmit an analog audio signal without any compression and then digitalized it. Practically, it is an old process and is never used these days.
In PCM, your Yamaha receiver will encode the analog audio signal and module it for recording. So, if your source devices such as PS5, Xbox, Blu-ray, etc. are set to PCM and your receiver is also set to PCM, then you cannot get a 5.1 surround audio track from it.
Why PCM Is Displaying on Yamaha Receiver?
The Yamaha receiver will show whatever the source device will send. Your Yamaha receiver showing PCM on its display means it is receiving PCM from the source device.
There can be many reasons which can trigger the issue that your Yamaha receiver suddenly starts displaying PCM on its display. In most cases, the cabling problem is main the culprit of the issue.
However, the electric short circuit is another reason which burns out the important components such as blown fuse and capacitors. For this, the receiver may unable to encode digital signals and start displaying PCM as it can still encode the analog signal.
Get superior audio with Yamaha Receiver! Fix PCM display issues with ease. Upgrade now!
How to Turn Off PCM on Yamaha Receiver?
To turn PCM off from your Yamaha receiver, you can try our given solutions below step by step.
1. Setup the Source Device
As the receiver receives signals from the source device so there are possibilities that the source device is sending the PCM signal and as a result, your Yamaha receiver is displaying PCM. Therefore, you need to customize the source device settings to fix this problem. The instructions to set up the source device are given below:
- First, enable both Dolby Digital and DTS on the source device (PS5, Xbox, Blu-ray, etc.)
- Then, set the output settings to Dolby or DTS.
- After that, ensure that the source device is streaming encoded audio formats via HDMI.
- Now, check the configuration of HDMI and if the audio output is set to PCM, then change it to BITSTREAM.
- In the end, turn off the BD audio mix setting if it is on.
Now, check your Yamaha receiver, and you are supposed to see that it displays Dolby. But if it still displays PCM then try the next solution.
2. Check the Cables
There can be a problem with the HDMI cables from your DVD player and the DVI cable which connects your receiver with the TV. There is a possibility that the DVI cannot communicate because of incompatible HDCP (High-bandwidth Digital Content Protection).
What you can do is, unplug the HDMI and DVI cables and restart the devices. After turning it on, plug back the cables and check if the Yamaha displaying PCM issue is solved or not. If not, then try the next solution below.
Upgrade your viewing experience with our high-quality HDMI and DVI cables! Solve your PCM issue and enjoy seamless, protected audio and video transmission.
3. Reset Your Yamaha Receiver
Precaution: You will lose all the previous settings on your receiver after resetting it.
If none of the solutions above work for you, then the final option in your hand is resetting the receiver. You can easily reset your Yamaha receiver by pressing and holding the square button and the power button simultaneously. Don’t forget to stand by your receiver by turning it off before resetting it.
Frequently Asked Questions
How Do I Switch to TV From Dolby Digital on My Yamaha Receiver?
- First, press the MENU button on your remote.
- Then, scroll down and go to Settings.
- Now, arrow over to Audio and press SELECT.
- After that, go to Dolby Digital and press SELECT.
- Then, choose “Standard Audio” and press SELECT again.
- Finally, press EXIT and you will be taken back to live TV.
How Do I Select Dolby Digital from PCM on Yamaha Receiver?
- First, press the HOME button on your remote, and then select [Settings].
- Then, navigate to [Sound] → [Digital Audio Out] → [Auto] or [PCM].
- Select [Auto] to switch from PCM to Dolby Digital.
- Before that, make sure that your receiver is connected via DIGITAL AUDIO OUT (OPTICAL) and is compatible with Dolby Digital.
What Should I Chose – “Auto” or “PCM”?
If you want to play the standard DVD, then you have to choose ‘Auto’. Because it will send the audio via Bitstream. On the other side, if you want to watch or play an HD DVD, then you have to choose ‘PCM’. So, choosing ‘Auto’ is the best option for playing HDMI audio.
Conclusion
That’s all on how you can fix your Yamaha receiver that displays PCM. You can simply fix it by following the methods. Just apply the solutions one by one until the issue is resolved. However, if any of your receiver’s components such as power supply, or cables burn out due to a short circuit, then you have to replace the components.
Good luck with fixing your Yamaha receiver with the given solutions in this article. Don’t forget to share which solution solved your problem in our comment section.
Subscribe to our newsletter
& plug into
the world of technology


