How to Replace the CMOS Battery on Your Motherboard: Step-by-Step Guide
If you’ve noticed that your computer is struggling to keep the correct date and time, or you’re seeing error messages like “CMOS checksum error” during startup, it may be time to replace the CMOS battery. The CMOS battery, a small coin-cell battery on your motherboard, plays a critical role in maintaining BIOS settings and system clock data even when the power is off.
Replacing this battery is relatively simple, but many users are unaware of how to do it properly. This step-by-step guide will show you exactly how to replace the CMOS battery on your motherboard, ensuring your system runs smoothly without losing vital settings.
What is a CMOS Battery and Why Does It Matter?
Before diving into the replacement process, let’s quickly cover what the CMOS battery is and why it’s important.
The CMOS battery (also called the RTC, or Real-Time Clock battery) powers a small chip on your motherboard that stores important information like:
- Date and Time: Keeps your system’s clock running, even when the computer is powered off.
- BIOS Settings: Stores configurations like boot order, system settings, and other hardware-specific parameters.
If the battery is failing, you might experience issues like incorrect system time, failure to save BIOS settings, or even problems booting up your computer.
When to Replace the CMOS Battery?
There are a few clear signs that indicate your CMOS battery may need replacing:
- Incorrect Date and Time: The system time resets every time you boot your computer, or it shows an inaccurate date and time.
- CMOS Checksum Errors: You might see an error like “CMOS checksum error” or “CMOS read error” when the computer starts up.
- BIOS Settings Reset: Your computer reverts to default BIOS settings, or you receive a warning message about them.
- Booting Problems: Some users experience boot issues, as the system can no longer recognize certain settings stored in the BIOS.
What You’ll Need
- New CMOS Battery: The most common CMOS battery type is a CR2032 lithium coin cell. You can buy this battery at most electronics stores or online. Double-check your motherboard’s manual to make sure you’re purchasing the correct size.
- Small Phillips Head Screwdriver (optional): In some cases, you may need this tool to remove screws that secure the motherboard panel or other components blocking access to the battery.
Step-by-Step Guide to Replacing the CMOS Battery
Step 1: Power Off Your Computer
Before you do anything, turn off your computer and unplug it from the power source. This is important to avoid any risk of electrical shock or damage to sensitive components. If you’re working on a laptop, ensure the battery is also removed (if possible).
Step 2: Open the Case
For desktops, you’ll need to remove the side panel of the case to access the motherboard. Most desktop PC cases have screws at the back that hold the panel in place. Use a small Phillips screwdriver to remove the screws and slide off the side panel.
For laptops, access to the CMOS battery can be more complicated. In some cases, you may need to open the entire bottom panel, which may involve unscrewing multiple screws. Always consult your laptop’s manual for the specific location and access steps.
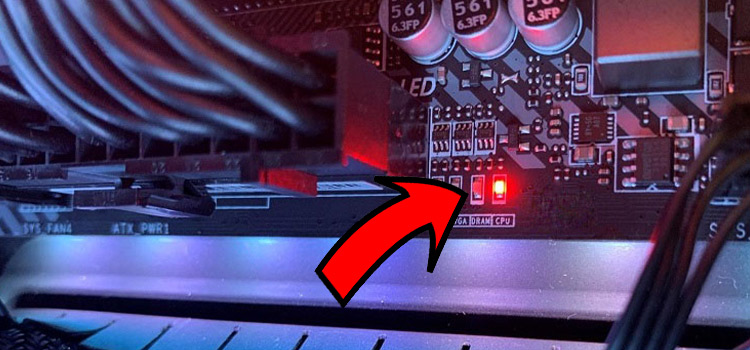
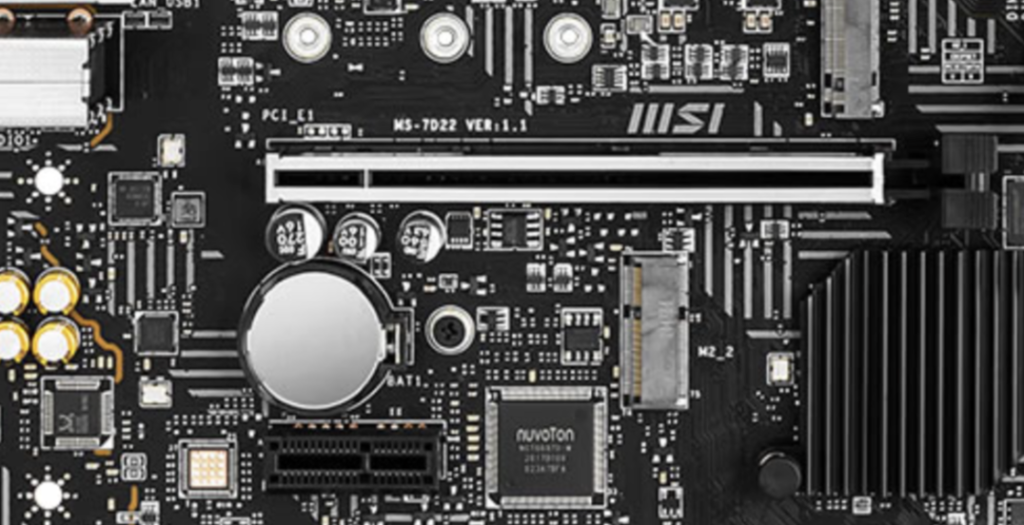
Step 3: Locate the CMOS Battery
Once you have the case open, the CMOS battery is usually easy to find. It’s a small, silver coin-shaped battery (about the size of a dime), typically located on the motherboard. It’s often near the bottom edge or in a corner.
In some cases, the battery might be secured in a holder or bracket. There may also be other components around it that make it less visible, so take care when looking.
Step 4: Remove the Old CMOS Battery
To remove the old CMOS battery, gently push the small clip or tab holding the battery in place. Most battery holders use a spring-loaded clip that keeps the battery secure. The battery should pop up easily once the clip is released.
Be sure to avoid using excessive force, as you don’t want to damage the motherboard or surrounding components. If the battery is difficult to remove, you can use a pair of plastic tweezers to carefully lift it out.
Step 5: Insert the New CMOS Battery
Now, grab your new CR2032 lithium battery and carefully insert it into the battery holder. Make sure the positive side (+) of the battery is facing up (you should see the printed label on the top of the battery). The battery should snap into place securely without much force.
Double-check that the battery is seated correctly and securely in its holder.
Step 6: Reassemble the Computer
Once the new CMOS battery is in place, it’s time to put everything back together. If you’re working on a desktop:
- Replace the side panel of your case and screw it back into place.
- Plug your computer back in and reconnect any peripherals (keyboard, mouse, monitor, etc.).
For laptops, ensure the back panel is properly reattached and all screws are tightened.
Step 7: Power On Your Computer
Power on your computer. You may see a warning message about the CMOS battery being replaced, or you might be prompted to enter BIOS to reset the system’s settings. If you see this, press the appropriate key (usually F2, DEL, or ESC) to enter the BIOS setup.
Here, you’ll want to:
- Set the date and time correctly.
- Adjust any other BIOS settings that may have been reset to their defaults.
Once that’s done, save your changes and exit BIOS. Your system should now be back to normal.
Final Thoughts
Replacing the CMOS battery is a quick and easy fix for any issues related to your system’s clock, BIOS settings, or boot errors. Most of the time, all you need is a new CR2032 coin-cell battery and a few simple tools to get the job done. This simple maintenance task can help your system function more reliably and prevent unnecessary errors.
If you continue to encounter issues after replacing the battery, there may be a deeper hardware issue that requires professional attention. But for most users, this quick fix can solve many annoying startup problems and restore your computer’s functionality.
Happy computing!
Subscribe to our newsletter
& plug into
the world of technology