How to Connect Oculus Quest 2 to PC with USB-C | Your Ultimate Guide
Virtual reality has been a game-changer, with the Oculus Quest 2 leading the charge. But as many users quickly discover, connecting it to a PC can unlock even more immersive experiences.
However, many Oculus Quest 2 users have been asking about the process of connecting their headset to a PC. If you are one of them, then here is a short tip on connecting:
- Launch the Oculus PC application.
- Insert a compatible USB-C cable into a USB-C port on your computer, ideally on the front to make the most of the cable’s length.
- Connect the other end of that cable to your Oculus Quest 2 headset.
Ready to take the plunge into deeper VR waters? Let’s get that Oculus Quest 2 connected to your computer using a USB-C cable.
Why Connect to a PC?
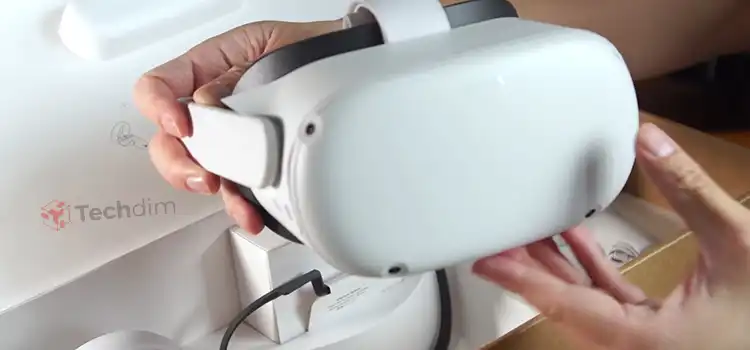
The Oculus Quest 2, a standalone VR headset from Facebook’s Oculus division, has taken the VR world by storm. With its sleek design, user-friendly interface, and impressive game library, it’s a top choice for many.
Sure, the Oculus Quest 2 is pretty powerful on its own. But connecting it to a PC:
- Expands Game Library: Access to Oculus Rift and SteamVR titles.
- Improves Graphics: PC VR games can offer better visuals, courtesy of your computer’s GPU.
- Offers Development Opportunities: For the tech-savvy looking to develop or test VR applications.
Steps to Connect Your Oculus Quest 2 to a PC via USB-C
Here is the step-by-step guide on connecting your Oculus Quest 2 to your PC using a USB Type-C cable (The process you’re looking for):
Step 1: Get the Right Cable
The original charging cable that comes with the Quest 2 is a USB-C cable. While it technically can work, for a more consistent experience, consider investing in the Oculus Link cable or a high-quality third-party USB 3.0 USB-C cable.
Step2: Install Oculus Software
- Head over to the Oculus official site and download the Oculus PC software.
- Run the installer and follow the on-screen instructions.
Step 3: Enable Developer Mode
This might sound all techy and secretive, but it’s pretty straightforward:
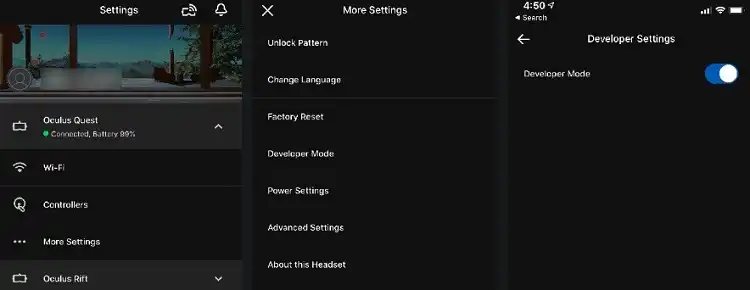
- Open the Oculus app on your mobile device.
- Navigate to ‘Settings’, find your Quest 2, and connect to it.
- Tap ‘More Settings’ > ‘Developer Mode’ and then toggle it ON.
Step 4: Plug it In
- Connect the USB-C end to your Quest 2.
- Plug the other end (could be USB-C or USB-A) into a compatible port on your PC.
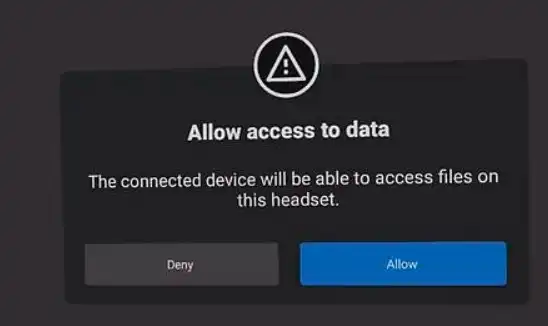
Step 5: Allow Data Access
When you first connect your Quest 2 to the PC, it might ask if you want to allow access to the data. Select ‘Allow’.
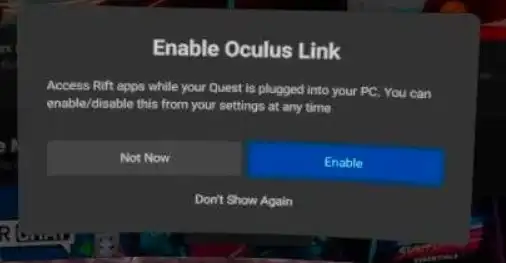
Step 6: Enable Oculus Link
On your Quest 2, you should get a prompt asking if you’d like to enable Oculus Link. Go ahead and confirm.
NOTE: Ensure your Oculus Quest 2 is updated to the latest firmware. Sometimes, new updates improve Link performance and compatibility.
Troubleshooting Common Issues on Oculus Quest 2 While Connecting
Issue 1: No Connection Detected
- Try a different USB port on your PC.
- Ensure you’re using a USB 3.0 port for optimal performance.
- Restart both your PC and Oculus Quest 2.
Issue 2: Choppy Performance
- Check that your PC meets the recommended requirements for Oculus Link.
- Ensure no other heavy applications are running in the background.
Issue 3: Audio Issues
- Ensure the Oculus software on your PC is set to use the Quest 2’s microphone and headphones.
Expanding Your Virtual Horizons
Connecting your Oculus Quest 2 to a PC provides a deeper dive into the limitless world of VR. Whether you’re battling aliens on new planets or walking through architectural renderings, the PC-link capability takes your VR experience up a notch (or ten). Now, put on that headset, step into the virtual realm, and remember: If you get tangled in the cord, it’s just reality reminding you it’s still there! Happy exploring!
Subscribe to our newsletter
& plug into
the world of technology
