[7 Fixes] Computer Stuck on Dell Screen
Computer stuck on Dell screen is too much common scenario for Dell users. The scenario varies from user to user. For some people, the computer is stuck on the Dell logo; for others, it’s the Advanced Repair screen, and so on.
It’s not only annoying but also frustrating when you’ve to finish your important tasks asap, especially those with deadlines. If you don’t know the solution to solve it, it seems like a nightmare, a scarier one. You can start by unplugging all the connected peripherals and rebooting your PC.
If the problem still persists, don’t worry. We’re here to help you by guiding you on how can you solve this stuck screen issue. So, without wasting time, read the whole article.
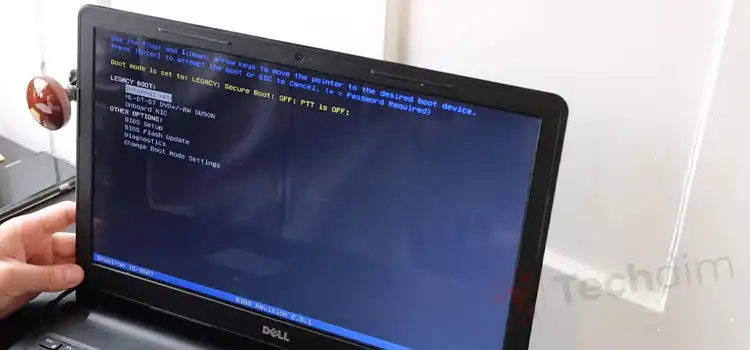
Solutions for Computer Stuck on Dell Screen
Frankly speaking, there’re so many possible reasons and you surely can’t blame one for occurring this problem until you find it out. Actually, for different users, the reasons can be different.
No matter what’s the reason, the following solutions will indeed prevent your computer from getting stuck. Apply them until the issue gets solved.
Solution 1: Disable Fast Startup
Previously it has been seen that the issue is related to fast startup. To disable it –
Step 1: Press Windows + I to get into Settings and select System.
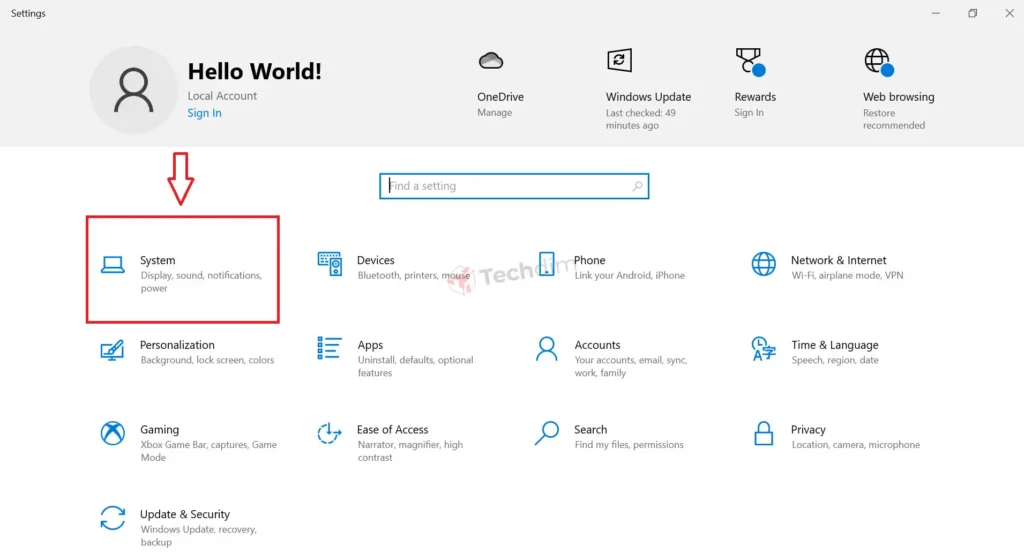
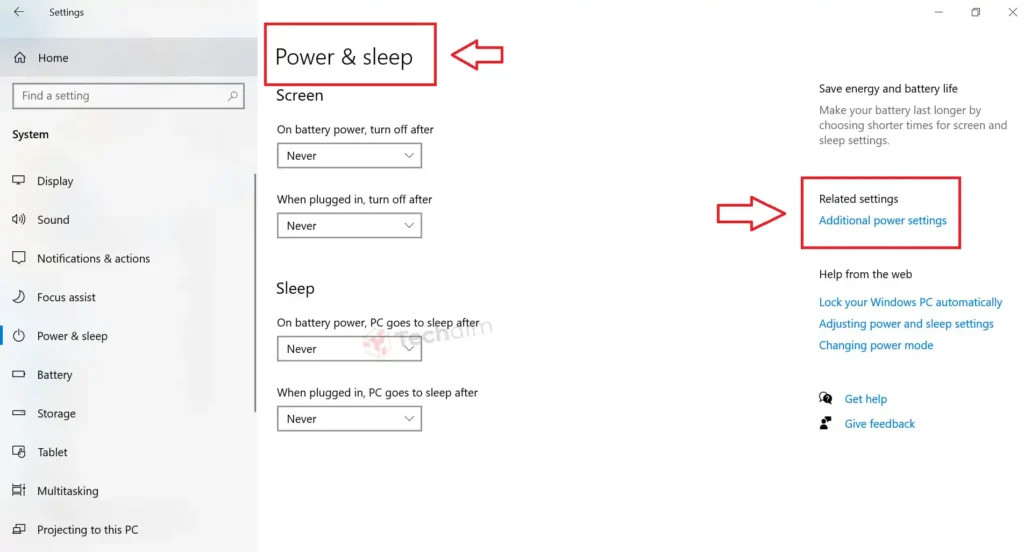
Step 2: Now, in the Power and sleep tab, click on Additional power settings.
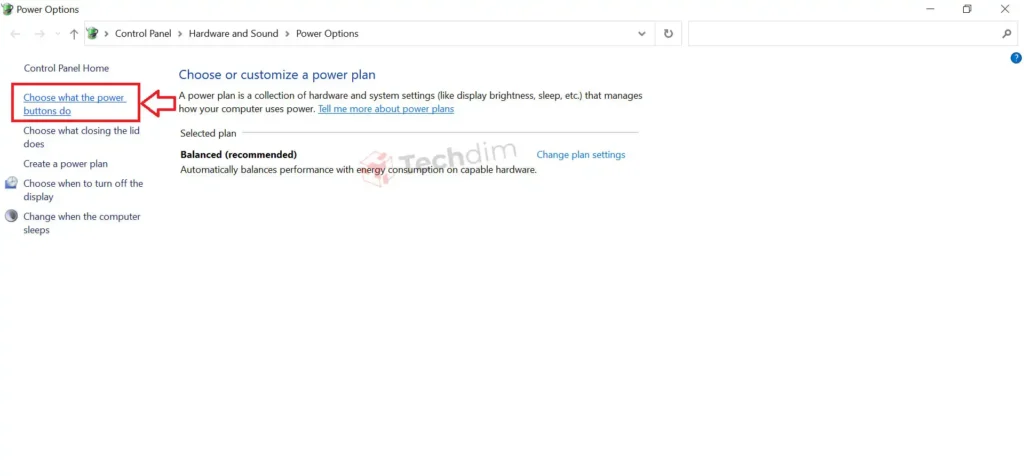
Step 3: On the left side, select Choose what the power buttons do.
Step 4: After that, click Change settings that are currently available.
Step 5: Under Shutdown settings, uncheck the Turn on fast startup box.
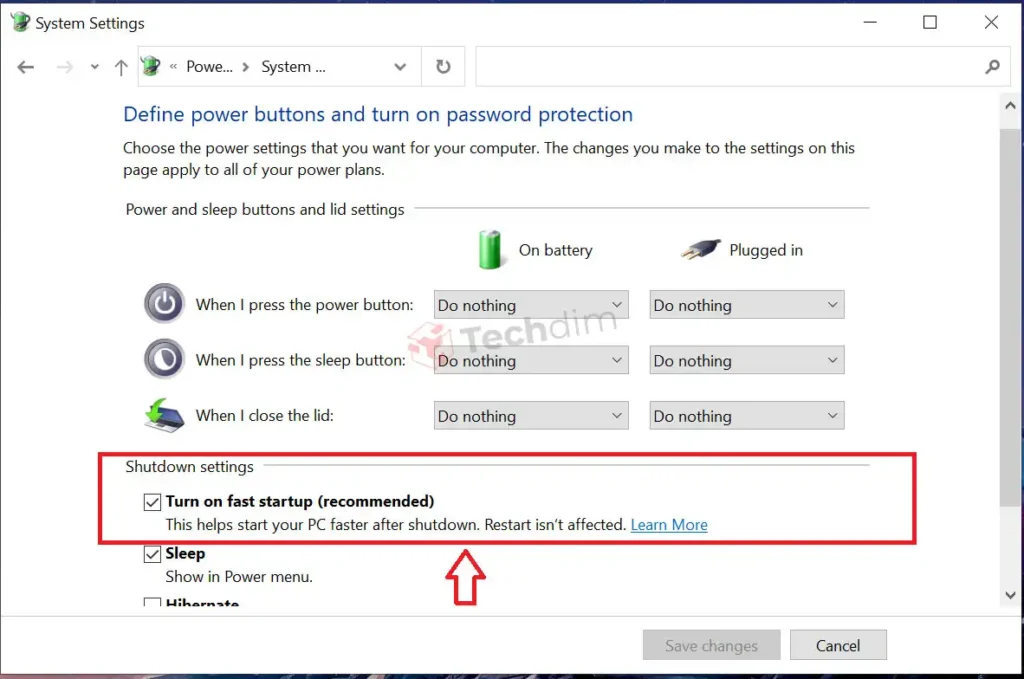
Step 6: Finally, save the changes.
Then restart your computer.
Solution 2: Run the eSPA Diagnostic
It’s worth running an ePSA diagnostic to diagnose and solve the problem. In this case –
Step 1: Turn on your computer.
Step 2: When the Dell logo appears, press the F12 key and enter the boot menu.
Step 3: Under OTHER OPTIONS, select Diagnostics.
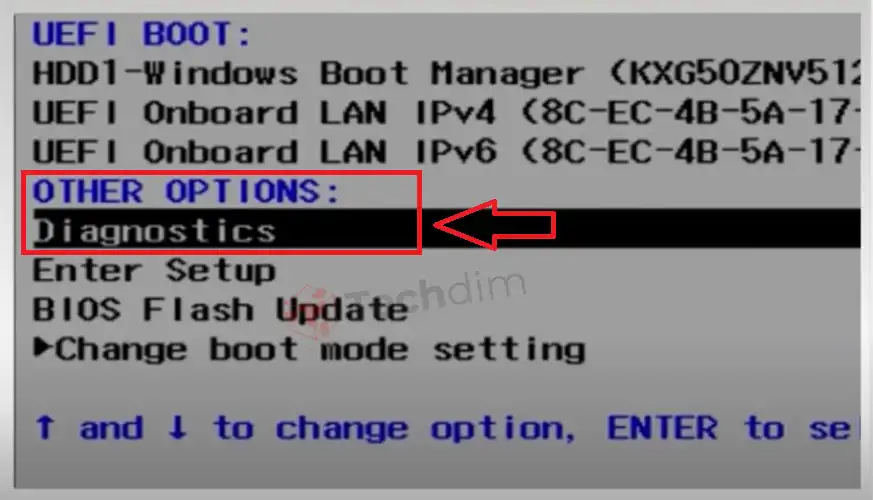
Step 4: Now, follow the onscreen commands to complete the diagnoses.
Step 5: If you receive any error code, note it and contact the Dell support team for help.
Solution 3: Boot Your Computer into Safe Mode
Try booting your computer into safe mode. To do that –
Step 1: First, turn on your computer.
Step 2: On your third attempt to boot up, the system will automatically enter Windows Recovery Screen.
Step 3: Now, in the Automatic Repair screen, click Advanced options.
Step 4: Select Troubleshoot.
Step 5: Choose Advanced options.
Step 6: Click on Startup Settings.
Step 7: Then click on Restart at the bottom-right.
Step 8: When your system restarts, press the F4 key to enable safe mode.
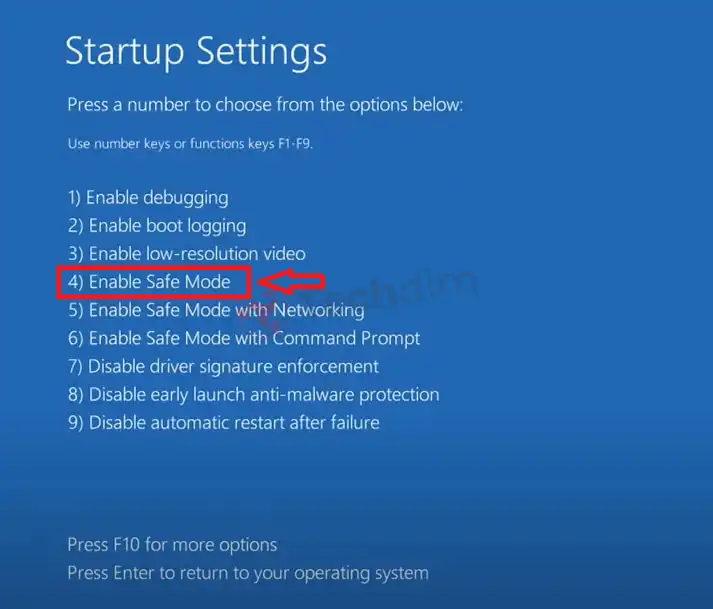
If your system boots into safe mode, then you need to perform a system restore. Otherwise, you should ensure that the hard drive gets detected.
Solution 4: Perform System Restore
In order to perform a system restore –
Step 1: Search for Recovery in the Windows search bar and select the one related to the Control panel.
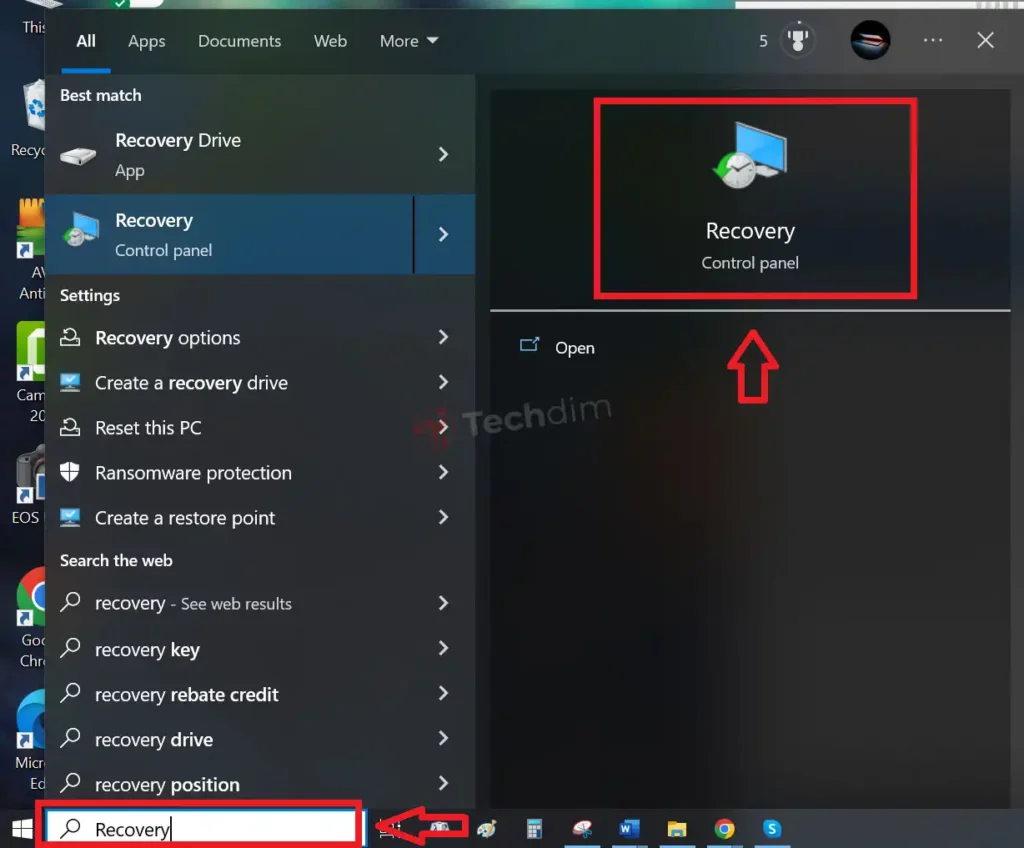
Step 2: Select Open System Restore.
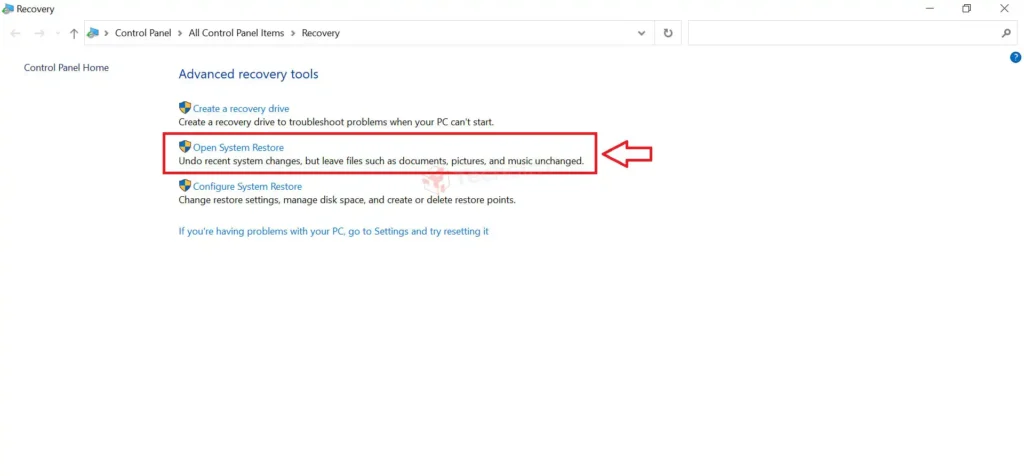
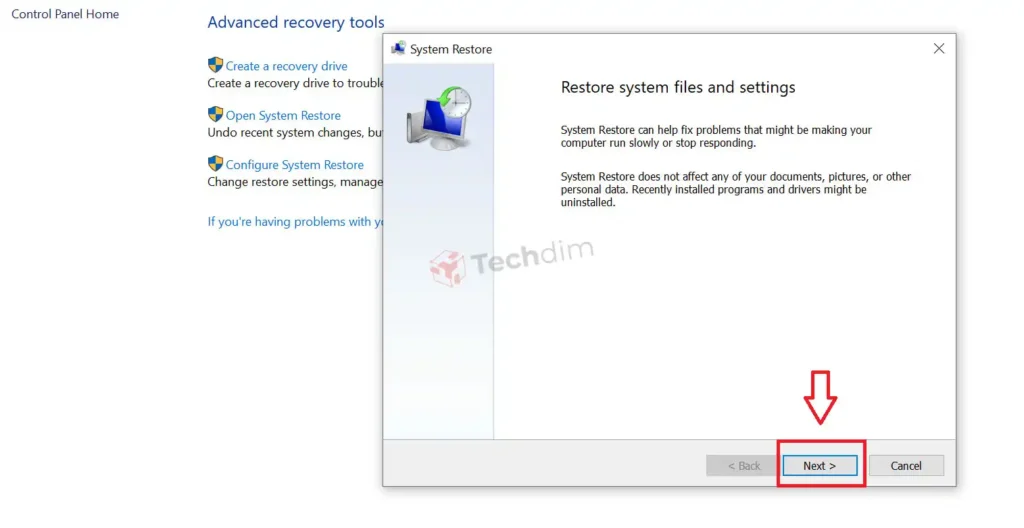
Step 3: Click Next.
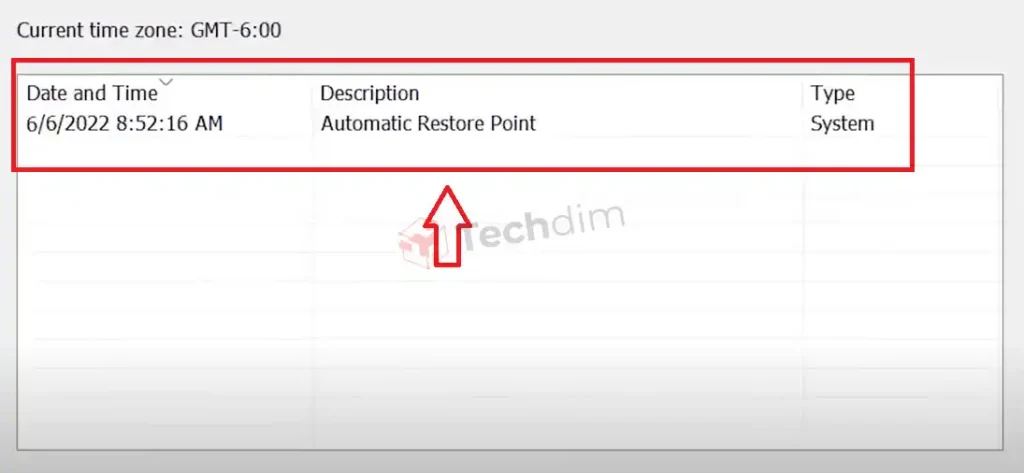
Step 4: Select the latest restore point from the list, then Next.
Step 5: Now, finish the restore process by clicking Finish.
Solution 5: Hard Drive Detection
Now, it’s time to check if the hard drive is detected. The process is –
Step 1: Start your computer.
Step 2: When the logo appears, press the F2 key repeatedly until entering BIOS.
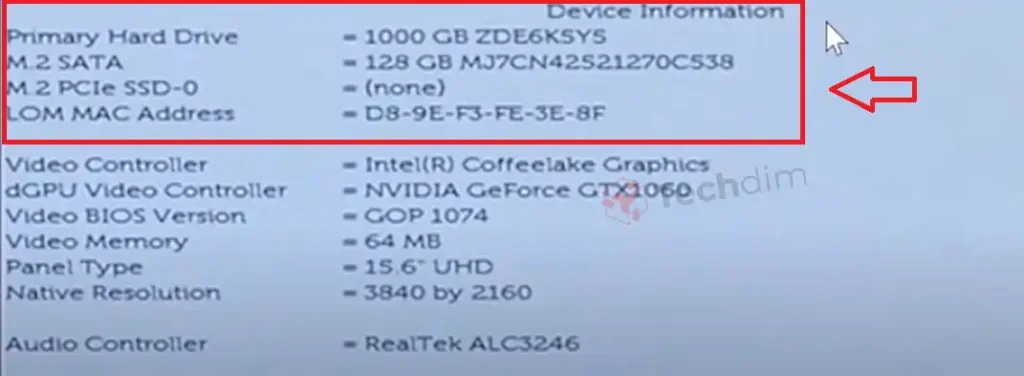
Step 3: Then expand General under Settings and select System Information.
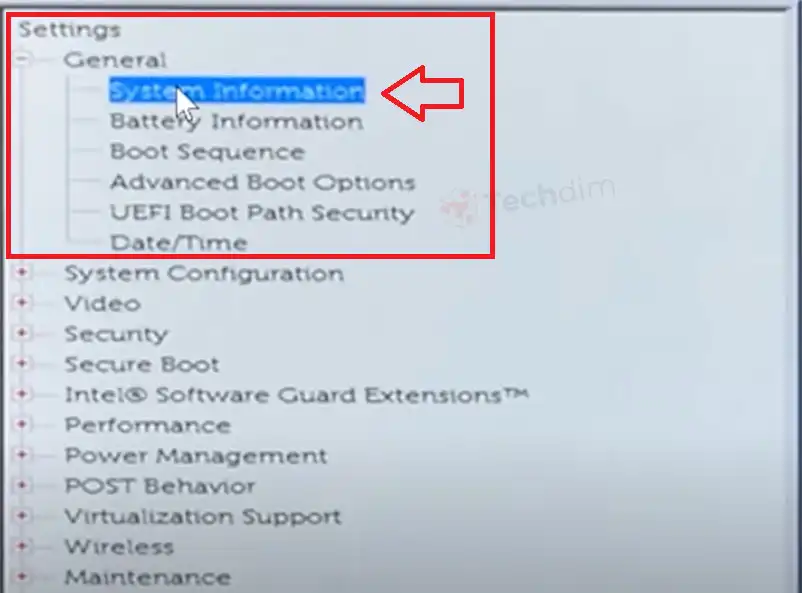
Step 4: Now, at the right pane, under Device Information, ensure that the hard drive is detected.
Solution 6: Reset the BIOS Settings
Another effective solution is resetting the BIOS to its default settings. To do so –
Step 1: Get into BIOS by pressing the F2 key.
Step 2: Now, expand the General settings and click on Restore Settings at the bottom.
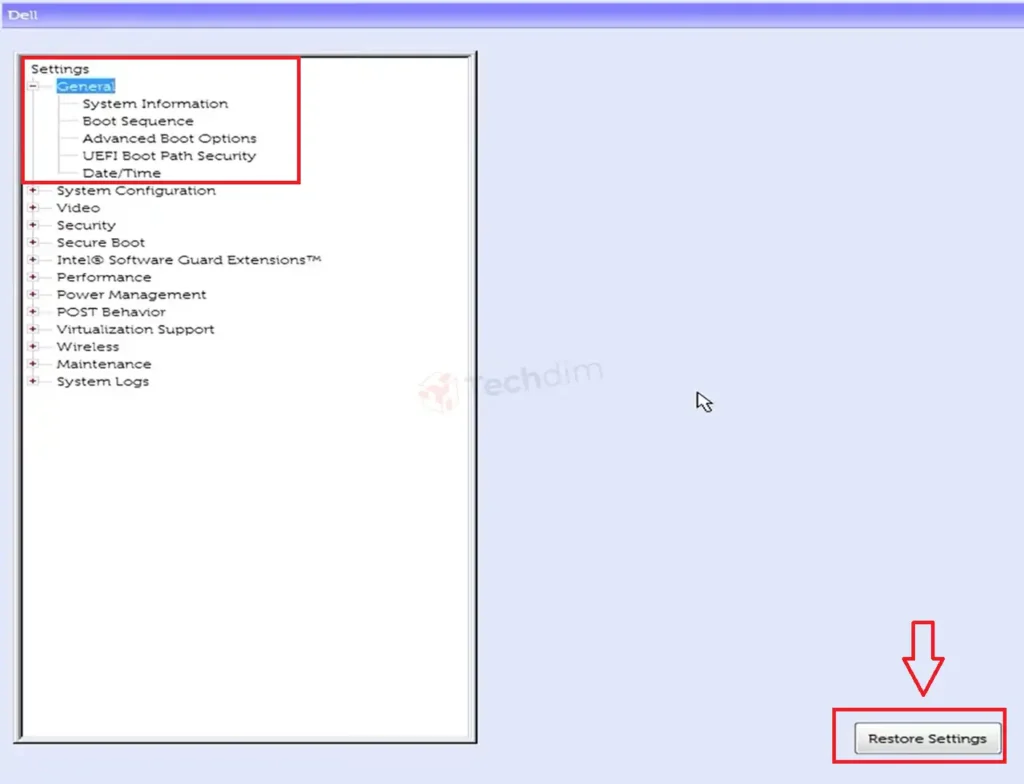
Step 3: Finally, click on Exit to save the changes.
Solution 7: Recover the Operating System, Create Recovery Media
If the previous methods somehow fail to solve the issue, you must try to recover the operating system. And to do that, you’ve to create a SupportAssist OS recovery media.
Step 1: Connect a USB storage device that can store at least 16GB to another computer.
Step 2: Open the Dell OS Recovery Tool.
Step 3: Then locate the computer where the operating system needs to install.
Step 4: Now, choose Another computer and enter your computer’s system’s service tag.
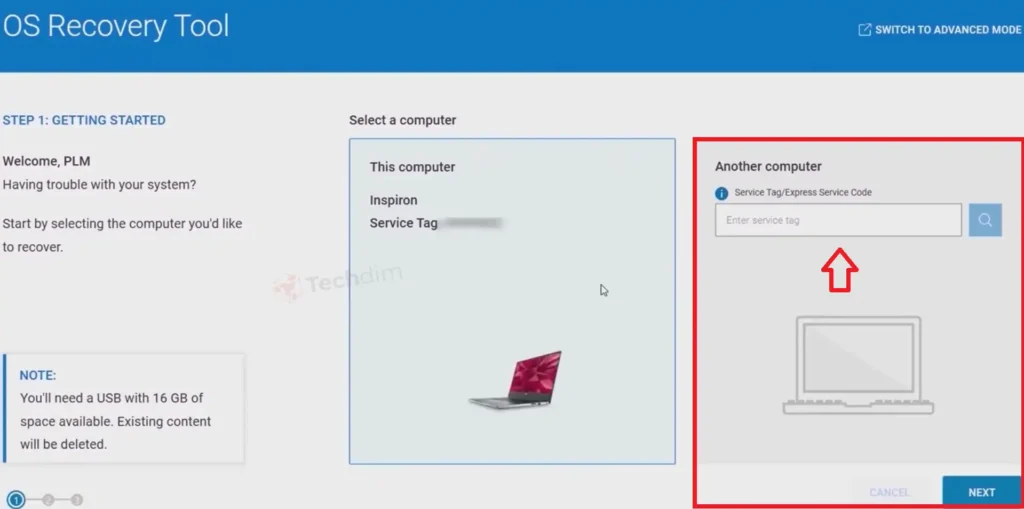
Step 5: After that, verify the USB device destination and check the agreement box.
Step 6: Click on Download.
Step 7: Now, connect the USB device to your computer and restart it.
Step 8: At the Dell logo, tap the F12 key again and again and enter the system setup.
Step 9: Head to the Boot menu and select the newly created USB drive.
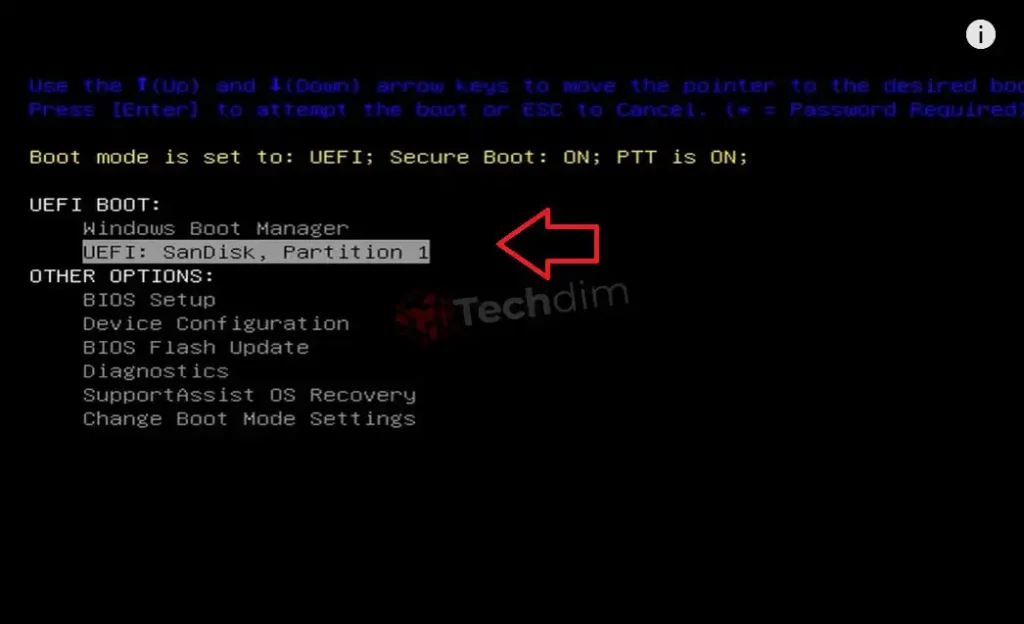
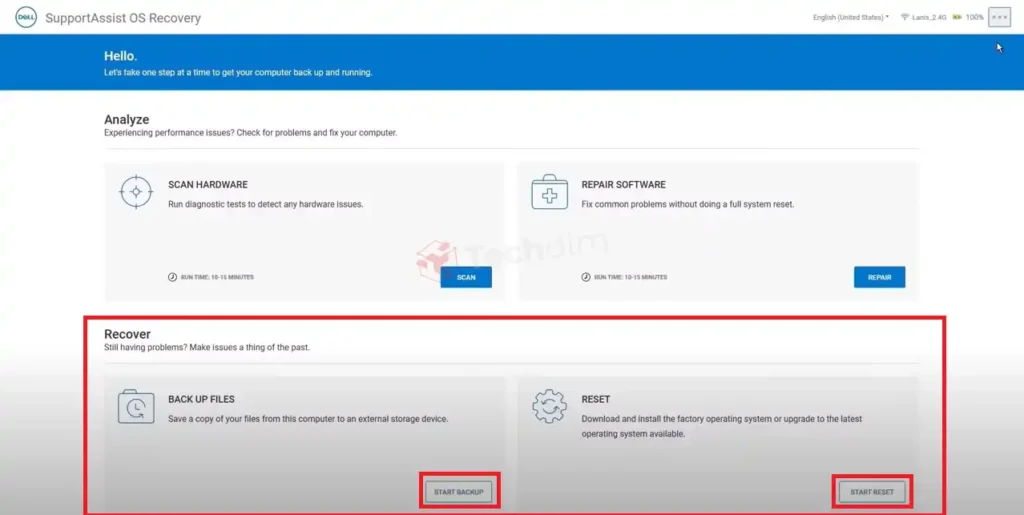
Step 10: In the SupportAssist OS Recovery window, under the Recover section, click on START BACKUP and then START RESET respectively to save a copy of your data and complete the recovery process.
That’s it!
Conclusion
To conclude, the computer stuck on the Dell logo screen issue is common worldwide and it already has the aforementioned solutions to get fixed. Applying the solutions will hopefully get you out of this problem. Feel free to knock us in the comment section for further questions.


