[Fix] Raspberry Pi USB Not Working (100% Working)
It may come as a surprise, but the root of the USB issue on Raspberry Pi is often a faulty external power supply. The USB spec might be getting ignored altogether when connected to a power supply, delivering power upstream to the Raspberry Pi.
Also, a low voltage between PP3-PP27 might be the culprit in some cases. Hence, you can try measuring the voltage as per the instructions found on the official Raspberry Pi website. If you find it anywhere between 0.01 to 0.06V, there’s definitely a power shortage, causing the problem at hand.

How Do I Enable USB Ports on My Raspberry Pi?
Enabling or disabling the USB ports is quite easy if yours is a Raspberry Pi 3B+. All you have to do is insert 1 to /sys/devices/platform/soc/3f980000.USB/buspower to enable them while writing 0 does the opposite.
Nevertheless, this method may not work if you’ve got the latest Raspberry Pi 4B with 4GB of RAM. Even trying uhubctl or hub-ctl commands might hardly help.
In that case, you have to use version 2.4.0 or higher of uhubctl since they support Raspberry Pi 4B. You can also build it from the master branch. Moreover, the solution requires you to use sudo rpi-eeprom-update to update USB firmware and enable power switching.
There’s one tiny drawback of using uhubctl on Raspberry Pi 4B. That is, it only allows turning off all ports together. On RPi3B+, however, there’s support for controlling either two ports independently or all four of them.
How Do I Access My USB on My Raspberry Pi?
Accessing a USB on a Raspberry Pi is not as spontaneous as a full-blown Windows or Linux computer. With that said, it is doable with a few commands that help mount your USB device. Whenever in doubt, follow these simple steps.
Plug the Device In
Find an empty USB slot and plug in your USB device. If there aren’t any slots available, you may consider removing other devices or using a Raspberry Pi-compatible USB hub instead.
Get the Unique ID
Inside the Linux terminal, run the command below to find the unique id of your USB drive, referred to as UUID (Universally unique identifier).
- ls -l /dev/disk/by-uuid/
The output will look something like this.

Here, the “/sda” reference indicates the inserted device. Next to the reference, in this case “sda1”, is the UUID of your USB device.
Create a Mount Point
You will need a mount point (a directory) that points to whatever is inside the USB drive. The following command will help you create a suitable directory.
- sudo mkdir /media/usb
Here, “usb” refers to the directory name, which you can change to what you like. Just try not to make it too long, or you will not be able to avoid typing mistakes later on.
After creating a directory, you have to run the following command to change its ownership and set it to the pi user.
- sudo chown -R pi:pi /media/USB
Mount the Drive Manually
Mounting the drive makes sure an ordinary Pi user gets access to reading, writing, or deleting on the drive. The command for the manual mount is as follows.
- sudo mount /dev/sda1 /media/USB -o uid=pi,gid=pi
Once the command executes, you will no longer need to use sudo for reading, writing, or deleting files. You can use “/media/USB” directly as a destination or a source folder.
Mount the Drive Automatically
Although manual mount lets you access files on a USB drive, for the time being, the mount is lost after a system reboot. That means you will have to repeat the above step each time you restart your Pi. To avoid that, edit the fstab file using the
“sudo nano /etc/fstab” command.
Next, type in the following.
UUID=18A9-9943 /media/USB vfat auto,nofail,noatime,users,rw,uid=pi,gid=pi 0 0
Make sure to swap the UUID with the one you noted before.
It will allow the boot process to advance without the drive plugged in. Plus, the file access time will no longer update after each read operation, boosting the performance by a tad bit.

Finally, exit the nano editor and reboot to check if the automount is working.
How Do I Fix ‘Raspberry Pi USB Not Working’ in Linux
Below are the steps for troubleshooting as well as fixing the unrecognized USB issue.
See if Linux Detects Your Device
Unlike Windows or macOS, Linux on Raspberry Pi doesn’t make an audible sound upon detecting a USB device. Therefore, you have to manually check whether or not the device got picked up by the OS. Here’s how.
Type in “lsUSB” in the terminal when you have no external USB devices connected. Remember the output and repeat the command, but this time with your USB device plugged in. An additional device alongside its Bus ID, Device ID, and USB ID should appear in the results.
If that didn’t do the trick, use the command below.
- dmesg | grep -i USB
You will now get a complete list of all the connected hardware devices on your Pi. The information, however, might overwhelm you. In that case, try using “dmesg | less” to make things understandable. Another user-friendly way of doing it is to use the “USB-devices” command.
If at this point, you cannot find your device on the list, chances are either the USB device or USB port is faulty. Or perhaps, Linux does not support the device you connected.
Check the USB Port
Pick a different USB port on your RPi and insert the device into it. If the USB device gets recognized, the port you chose before is probably flawed.
But if you don’t have access to another port, you can check if the USB drive works on another system. However, it is not an ideal approach, given some USB devices are compatible with other operating systems but incompatible with Linux. So, the best way would be if you could get your hands on another Linux device.
How Do I Fix My USB Slot Not Working
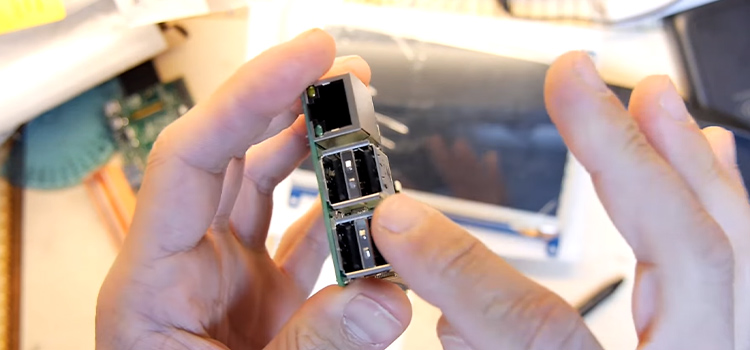
Once you know that the culprit is the USB slot rather than your USB device, you can opt for either repair or replacement. Typically, repairing involves fixing the USB cable or the port itself.
The first thing to do is check for dust accumulation, and if found, use a blower to clean things off. Before further inspecting the USB port, don’t forget to switch off your device and unplug it from the supply line. Look out for any hint of wobbliness as it indicates that the port is not seated firmly.
And if the port is barely holding on, you can try to solder it back to where it belongs. That, however, will require you to have at least some soldering expertise.
If the problem is not on a hardware level, perhaps the auto suspend setting is turned on. Generally, it helps reduce power consumption by restricting the power supply to the USB ports. You can turn it off by using this command in the Linux terminal.
- udisksctl power-off -b /dev/sdX
Bottom Line
If your Raspberry Pi USB is not working, the above scenarios should almost always explain why. But if you are still struggling to get hold of the situation, check whether or not your Pi has the necessary USB driver available. If not, contact the manufacturer as installing USB drivers is generally not a required field for RPi.
Subscribe to our newsletter
& plug into
the world of technology


