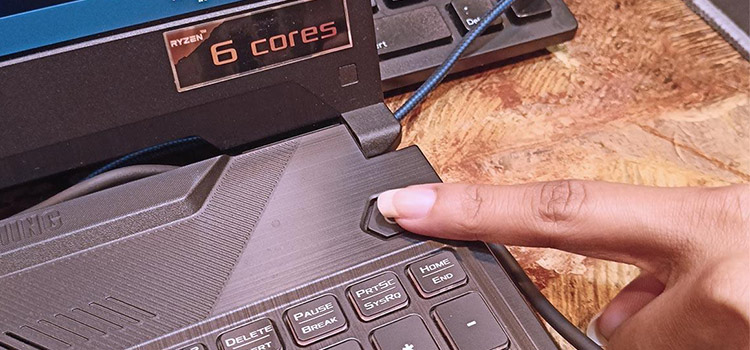
How To Turn On Laptop Without Power Button
Laptop components like the Power button can be damaged quite easily or it may stop working due to frequent use. You are a laptop freak person and get your job done by using a laptop. For example, you are a cyber security professional or IT Professional and have an important job to complete, like tracking a stolen laptop or Coding on a laptop.
For this, to keep yourself on the safe side, you can follow some easy methods that will help you to turn on your laptop without the power button very easily. So, be with us till the end as we have shared the methods about how to turn on a computer without a power button and secure your future as well as save your money!

How To Start A Laptop Without The Power Button
There are many tricks and ways available that you can follow to turn on a laptop without the power button. You can turn it on using the motherboard and its components also you can do it by allocating other keys/parts of your laptop.
So, let’s find out the ways that you can follow to turn on a laptop without the power button.
1. Motherboard Method
Motherboard method is basically popular among the technician. You can use the motherboard pins 1 and 3 to turn a laptop on.

The following example demonstrates how to switch on your laptop using the motherboard, albeit it is not recommended for general use.
- Opening your laptop’s bottom shell and removing the motherboard with the proper tools should be your first step.
- As soon as the motherboard has been taken out of the chassis, check to see if all other connections are still secure.
- Once the power button connections are disconnected from the motherboard, you can immediately turn on your laptop by using a metal screwdriver or wire to short the pins 1 and 3.
- After installing the motherboard, you can then access the BIOS to modify any settings.
Use this procedure with caution if your laptop’s battery is drained out and you want to turn it on using the adaptor’s AC (Alternate Current), and I suggest using a screwdriver to connect the pins.
2. Bind a Key on Keyboard to Turning on Your Laptop

Unless you have altered your BIOS settings, the following procedure works for most people. Most desktops and laptops have it enabled by default, and there’s no reason to disable it.
If you are certain you have switched it off, this procedure may still be worth a try because BIOS occasionally reverts to its default settings. Nothing harmful happens if you have it turned off, or your laptop doesn’t offer this option.
- First, you need to get to the BIOS settings interface. A unique key can be used to enter the BIOS at the initial startup of your machine. The majority will utilize either F2, F10, or DEL, albeit that key varies depending on the manufacturer and occasionally even the product line.
- You should check “Power Management” when you find the settings, likely under the “Advanced” tab in the BIOs. A choice with the words “Power On By Keyboard” or words to that effect will be displayed. Make the necessary adjustments and create a key for yourself; later, you will utilize it.
- You want to be sure that this method will function in an emergency. Try turning off your computer before attempting to restart it with a keyboard key. As if you had clicked the power button, your computer should turn on as a result.
With this, you will be able to use your keyboard from a laptop or any external keyboard to turn on your laptop.
3. Wall Socket Method

This technique works well with laptops like Lenovo, Dell, Acer, ASUS, MSI, Lenovo, and HP. It’s also a great solution for people whose laptops lack a power button and who don’t want to short-circuit it.
- Remove the cable connecting the power button to the motherboard.
- Take out the laptop battery.
- Plug the laptop into a wall outlet, and it will turn on.
- If you want to unplug your laptop from the power outlet, you must replace the battery in it.
On some laptops, you’ll need to adjust your BIOS to turn your computer on when it’s connected via AC.
4. CMOS Method
The clock battery approach is another hardware technique to start a laptop without the main power button. It is considerably quicker than the motherboard approach described below, but it can also restore the BIOS settings of your laptop:

- Your laptop must first be opened by removing the bottom case with a screwdriver and prying tools.
- The battery cable, which is separate from the charging wire for your laptop, should now be disconnected from the motherboard.
- The motherboard of your laptop’s clock or CMOS battery should then be removed.
- Following the automated startup of your laptop when your battery is connected, you can quickly access the BIOS if necessary.
You can start your laptop without plugging it in with this cold-start technique. It will also force your laptop to reset to its factory default settings, so keep that in mind as well.
5. Use Wake-On-Lan Feature
Utilizing the wake-on-LAN feature, which is only available for Windows 10, is one of the less well-known methods. Similar to the BIOS startup, this is an additional method that must be activated. However, it is not frequently the default option.

- In order to access your BIOS settings, press the F2 or Del keys.
- Navigate to the Start menu, then to the “Settings” menu.
- The “Update and Security” tab should be chosen.
- The left-hand column will have “Option Recovery” listed.
- Either “Restart Now” or “Advanced Setup” should be an option when you receive a prompt.
- Select “Advanced.”
- Enter the section name, either “Power Management” or “ACPI Management.”
- Check the “Power on LAN” or “Wake On LAN” options on your PC.
- Toggle on these features using the adjusting keys, then choose your chosen key to switch on your laptop using the keyboard (much like the method above).
- F10 to save and exit
After completing all those processes, you must proceed by configuring the network card to start your system. To accomplish this:
1. Navigate to Start and search for “Device Manager.”

2. When the menu appears, look for the “Network Adaptor” option.

3. Select “Properties” from the context menu when you right-click on that choice.

4. Enter the Power Management options.

5. Allow this device to wake the computer by checking the corresponding box.

6. Enter “Device Manager” into the search bar on the Start menu by returning there.
7. It will start to search for networks and open the options.
8. Turn off the Windows computer.
9. Connect to the LAN and observe if the system turns on.
6. Laptop Lid Method

Even though you may already be using your laptop’s lid to put it to sleep, you can also use it to turn it on even when it is fully off. To accomplish this, modify the following BIOS settings:
- Holding F2, F10, or the DEL key after powering on your laptop with the power button or the hardware methods mentioned above will allow you to enter the BIOS.
- Open the Power Management or Power Settings tab once you’ve accessed it.
- Press F10 to save your settings after locating and selecting the Power on with Open Lid option.
- Your laptop will now turn on automatically anytime you open the lid without pressing the power button.
6. Use Power on with Open Lid Option
Even though you may already be using your laptop’s lid to put it to sleep, you can also use it to turn it on even when it is fully off. To accomplish this, modify the following BIOS settings:
- Holding F2, F10, or the DEL key after powering on your laptop with the power button or the hardware methods mentioned above will allow you to enter the BIOS.
- Open the Power Management or Power Settings tab once you’ve accessed it.
- Press F10 to save your settings after locating and selecting the Power on with Open Lid option.
- Your laptop will now turn on automatically anytime you open the lid without pressing the power button.
Bonus Tips: How To Install A New Power Button On A Laptop
If your laptop’s power button is broken then this portion can help you to save technician cost. You can follow these following steps to install a power button on your laptop very easily. Before starting installing the power button, be sure the power source is disconnected. Take a snapshot of the interior of your computer so that you may refer to it when you reassemble it.
So, let’s find out how you can do that!
- Now, open up the back part of your laptop and gently remove the hard drive and RAM.
- Look for the power button as you remove the top frame.
- Remove the power button and replace it with your new power button.
- Reassemble the components starting with the top frame, moving on to the keyboard frame, hard drive, RAM, and finally, the entire system.
- The button can be used to restart your computer. Even though pressing it initially could be challenging, it will get simpler with practice.
Conclusion
So, by now you have learned how you can turn on your laptop without the power button. These processes are very easy. One notable thing you should always remember is, when you are tweaking the hardware parts, always do it carefully otherwise you may end up damaging them!
Subscribe to our newsletter
& plug into
the world of technology


