How to Make Portable Apps | Launch the app anywhere
These days users are not limited to a single desktop or laptop and they rely on multiple computers. But what if you want the same environment as your regular computer on any other one? Well, portable applications are like boons when you feel this way.
If you are used to Chrome then you will not need to compromise using Opera mini on any computer. Just a few steps and you can get your quotidian app at your fingertips wherever you go. Let’s go ahead and see how to make portable apps with some pellucid steps.

What is a Portable App?
Before going ahead, let’s discuss briefly what a portable app is. A portable application is a version of an original application that is designed to be easily moved and launched on any computer without installation. It is also referred by Standalone.
Making a portable version is kind of fooling the app to think the dependencies are hunky-dory and it is running on the original computer. When we install a new application, it makes some changes in the system while integrating itself. But portable apps don’t record anything in the windows registry and avoid making any change of configuration.
You can carry it on any external hard drive or flash drive or even you can save it on cloud drives like Dropbox or Google drive to get it online from anywhere. Besides portability and avoiding frequent installations, consistent program settings across computers, security, run multiple versions of an app together are some benefits of portable apps.
Download the ready-made portable app
There are many portable app creator software that helps to replicate the dependencies of an application virtually to make it portable by scanning while installation. But some developers create a portable version of apps by design, so, before proceeding with any of these processes below, you should check if someone has already done the task before and the portable version is already somewhere on the internet ready to download.
How to make portable apps using Cameyo software
Before proceeding, you have to make sure the application of which you are going to make a portable version is not already installed on your computer.
- To start up you have to download the Cameyo software and then install it on your computer. Then run the software and it will ask you “Which module to run?”. There select “Capture an installation” from the window of Cameo and hit the ok tab.
Now, this software will be making a snapshot of the system and scan through all the files and installed software of the computer before the next step. The process will take a while according to how much software is there on the computer for scanning.
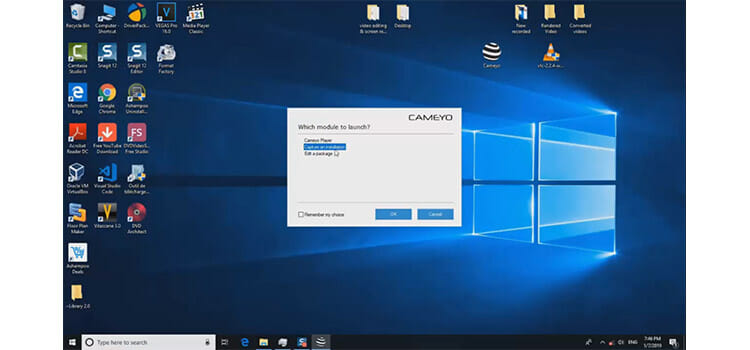
- Once the software has finished making the snapshot or system scan, you are allowed to install the particular software that you want to make portable. If the installation asks for a reboot, simply reboot it, don’t hesitate. For instance, we will be making a portable version of the VLC player. So, we are going to simply install it now. To see if there is an installation error, we will run the software for once.
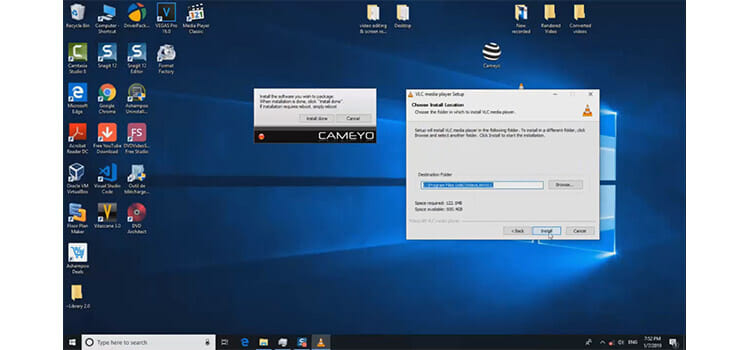
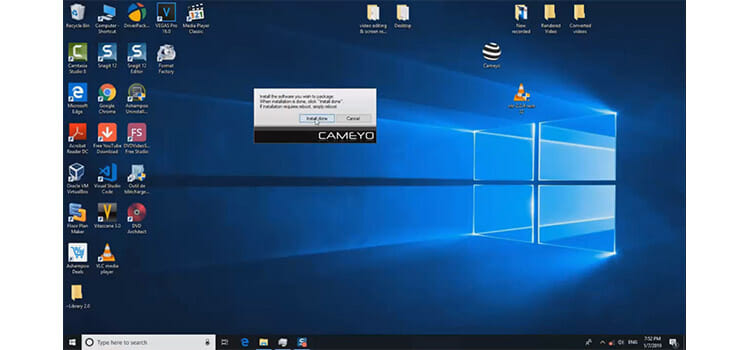
- Now, let’s come back to the window of Cameyo and click on “Install done”. This will start up the process of post-installation scanning or making a snapshot of the system again. Wait for the process to finish that will take a few seconds to a few minutes.
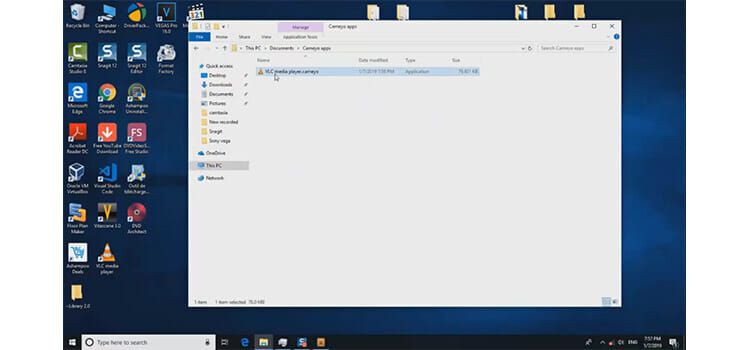
- Once the process is done, Cameyo will show you the directory of where the package is stored on the computer. In this case, we can see it is in user documents. If we go to the location, there we can see the portable version of the VLC media player in the Cameyo application folder that we wanted. Now it is ready to be moved on a flash drive and run on any computer without the installation process.
How to make a portable app using WinRAR
To start up the process, first, you have to make sure the software WinRAR is installed on your computer. If it is not there, install one and you are ready to go ahead.
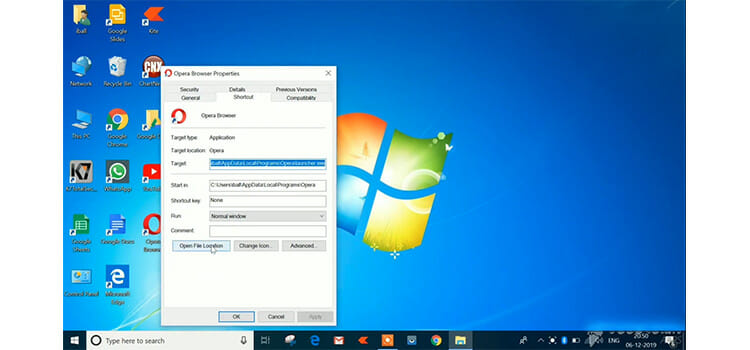
- First, find out the application program directory you would like to make a portable one. Here we will show you the process by making a portable version of Opera mini-application. You can right-click on the application and then go to the properties. Then there click on the “Open File Location” and this will lead you to the app file location.
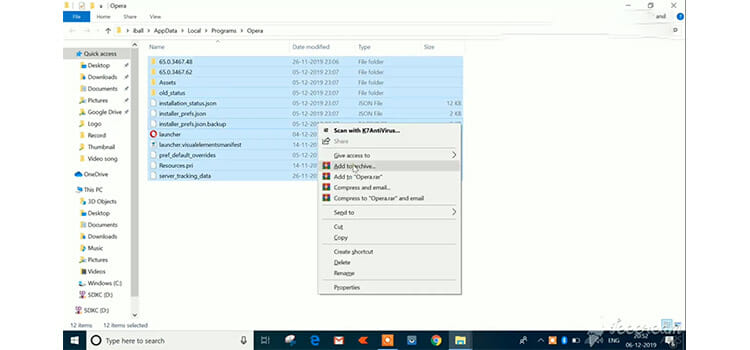
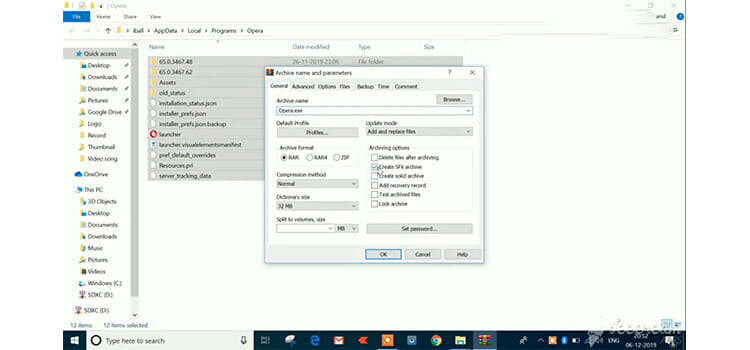
- Then, we will copy the main application name from the location. Now, we will select all the files there in the Opera folder and right-click on it. From the menu select “Add to archive…” and this will lead to the “Archive name and parameters” window.
- There we have a few tasks to do. Under the general option, click the cursor on the “Create SFX archive“ tab to select it.
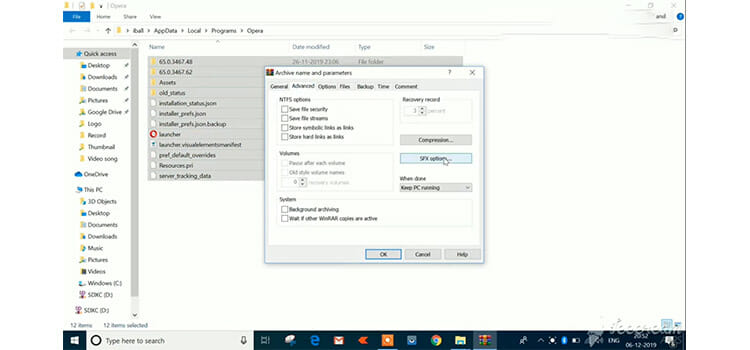
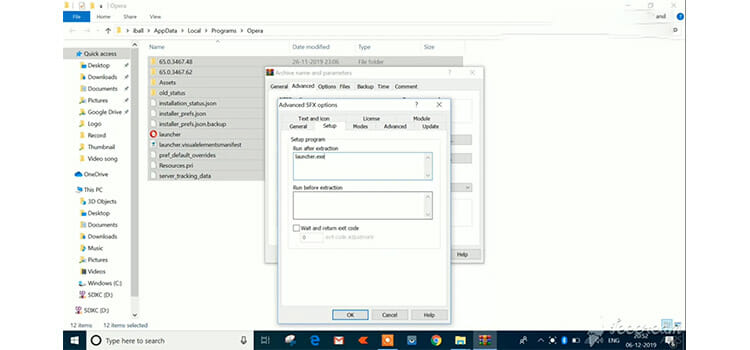
- Then under the “Advanced” tab, we will go to “SFX options”. In the “Setup” tab where we will paste the copied application name in the “Run after extraction” box. We will add an extension of “.exe” with the pasted name.
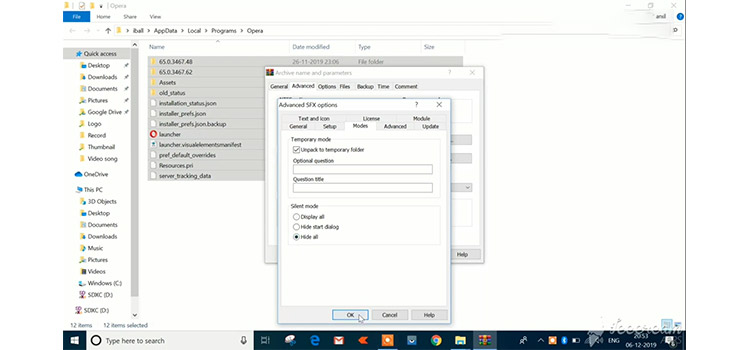
- Now, we will go to the “Modes” option and select the “Unpack to temporary folder” there. Also, we will choose the “Hide all” option and hit on ok from this window and also the previous archive window. This will initiate the process and will take a while.
- When the process is completed, there you will see a portable version of the application stored in the main application program folder. We will just copy the application on a flash drive.
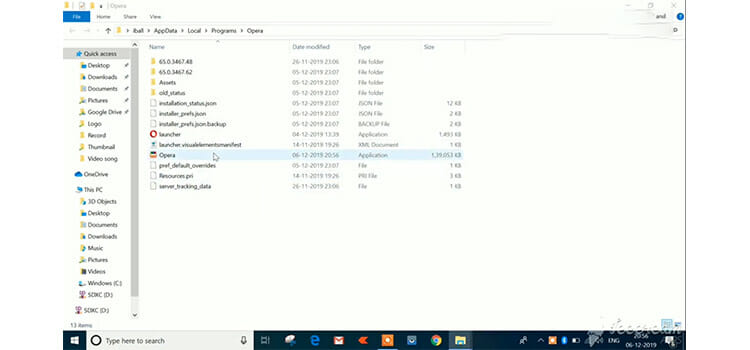
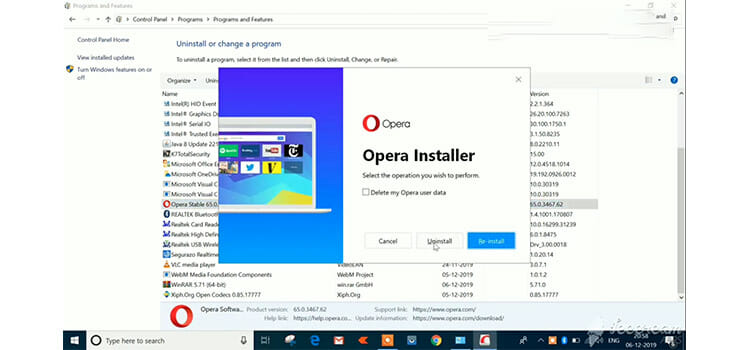
- Then uninstalling the main opera mini application from the system, the new portable opera mini will be ready to run from the flash drive and you need not install it each time when you plug in the drive to another computer.
How to Make a Portable App Using EVALAZE
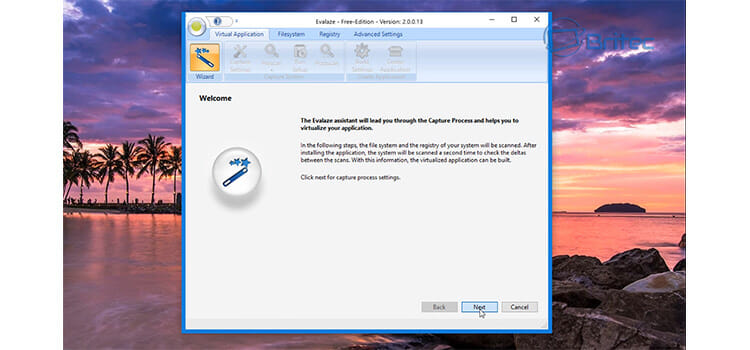
- Before starting the steps, you have to first download the free version of EVALAZE on your computer and install it there. Now open up the software. Hit the “Wizard” option with the magical wound sign from the top-left corner and tap on “Next”.
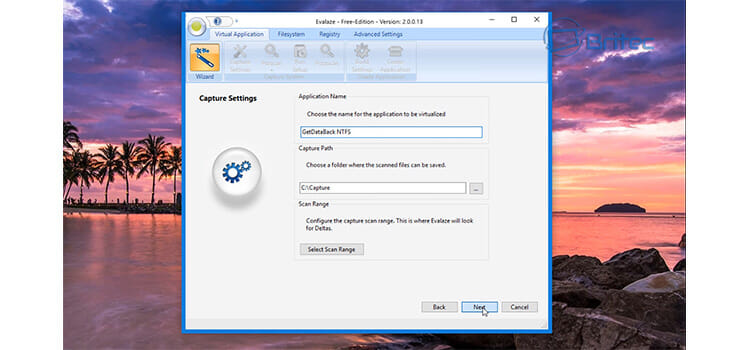
- Then you have to name the new portable version of the app as you want in the first empty box. Here for instance we will name it “GetDataBack.NTFS”. Then if you want, you can predefine the location where you want the app to be saved in the second empty box. In the “Select Scan Range” option you can select the drive where to perform the scan. When all of these are done hit on the “Next” tab.
- Now to perform the pre-scan on the system, hit next and you will see the process has been initiated.
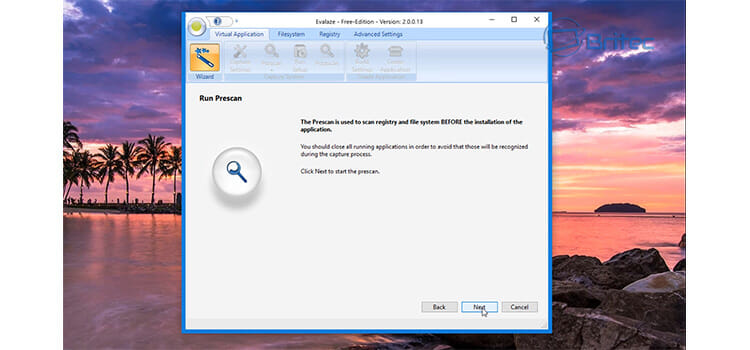
- After a while, once the pre-scanning is complete, you need to install the program so that the app can record and create virtual custom dependencies for the app. So, using the program of the app on the computer, install it normally as you do.
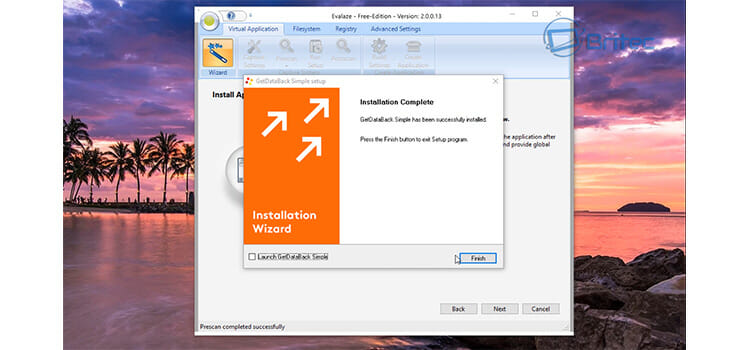
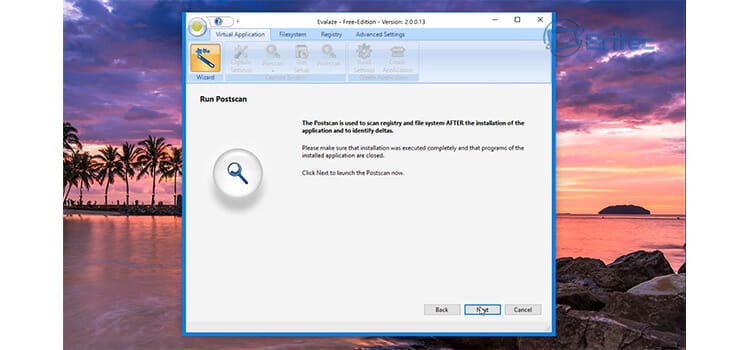
- Now, open up the installed program and go back to the previously opened window of EVALAZE. To start up the post-scan you have to click on “Next”. Post-scanning will detect that program you have installed a moment before.
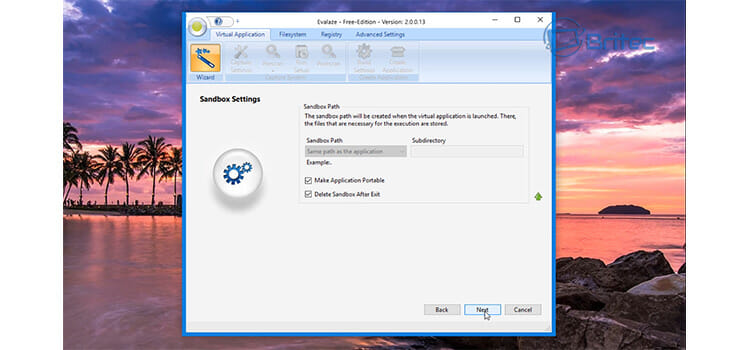
- Once the post-scanning is completed, tap on “Next” there and select “Make Application Portable”. Select “Delete Sandbox After Exit” if you wish. After all these selections are done, go next.
- Finally, here you will see the virtual file location and if you go next, it will start the main process of making the portable app you are waiting for.
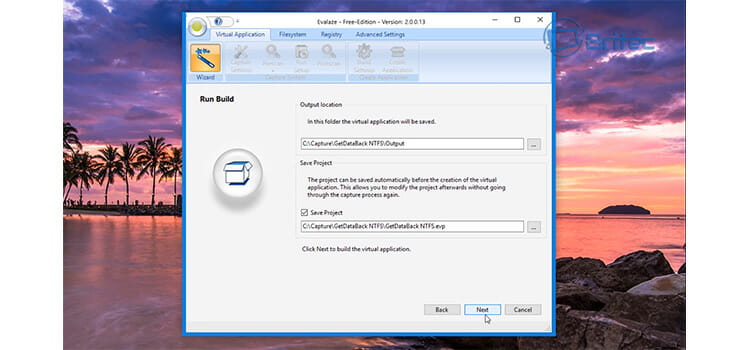
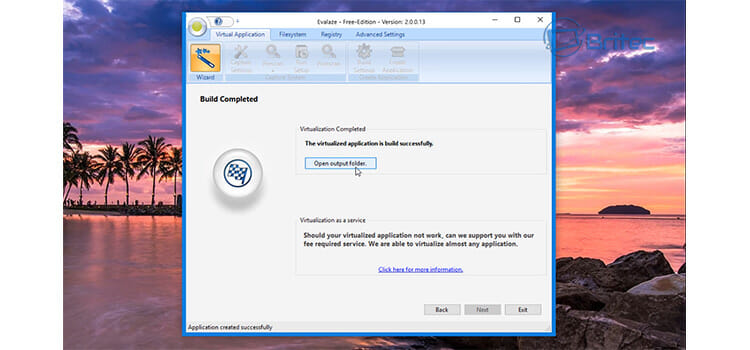
- Now, when it is finished, you can find the portable app by going to the “Open output folder”. Then move it to the location where you want and run it.
Wrap Up
A portable version of any software helps you to avoid the hassle of installing that app on any other additional computer. So, they are like an apposite solution to save you time and hassle. In this article, we have discussed three methods of how to make portable apps with some compendious steps. If you cannot find the portable version of your favorite app on the internet then you can use Cameyo, WinRAR, or EVALAZE according to your convenience.
Subscribe to our newsletter
& plug into
the world of technology


