How to Fix an SSD Not Initialized?
Solid state drives or SSDs are quickly becoming the storage medium of choice for computers instead of traditional spinning hard disk drives or HDDs. SSDs provide vastly improved speed, durability, shock resistance, and silent operation compared to HDDs. However, as with any hardware, SSDs can occasionally encounter technical issues requiring troubleshooting.
One potential problem is an SSD not being properly initialized, preventing it from being detected, accessed, or formatted by the operating system. This extensive guide will cover SSD initialization in depth – ranging from causation factors, structured troubleshooting steps, drive repair procedures using multiple methods, initialization options, partitioning methods, and even data recovery options. Follow carefully and your unrecognized SSD will be back to peak performance in no time!

What is an SSD and What Does “Not Initialized” Mean?
A solid-state drive utilizes flash-based memory chips rather than magnetic platters to store data. No moving parts enable SSDs to operate silently while resisting physical shocks and vibrations. Interfaces like SATA and M.2 allow easy installation directly onto a computer motherboard.
When an SSD is connected but not initialized correctly, the operating system cannot prepare the drive for actual data storage usage. Vital communication protocols are not established without initialization, rendering SSD capacity unavailable and preventing access for saving files or installing programs.
Why Proper Initialization Is Vital for SSD Functionality?
Initializing an SSD communicates critical information to the operating system, so it understands exact SSD parameters for data storage usage moving forward. This registration process facilitates vital background work regulating how the OS can access, read, write, delete, and modify files on the SSD according to flash memory needs.
Without correct SSD initialization, attempting to access or store files and folders will be unsuccessful or possibly even dangerous by making incorrect changes to data the OS cannot interpret properly.
Symptoms of an SSD Not Initialized
When an SSD is connected but failing to initialize appropriately, here are common symptoms users will experience –
- SSD does not appear within the Disk Management utility
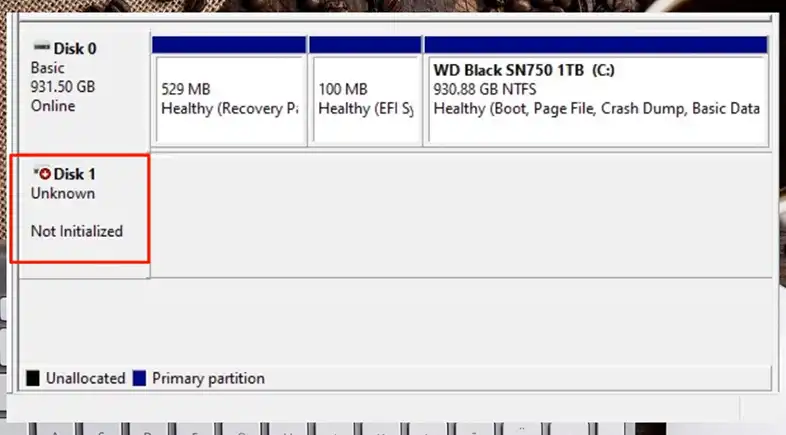
- Unknown disk labeled “Not Initialized”
- “Disk Unknown Not Initialized” error message appearing
- SSD detected in BIOS but not from within the operating system
- Inability to access, read, or write data from SSD
Essentially, the operating system remains unaware of SSD functionality parameters without initialization and cannot enable file storage capabilities as needed.
What Causes an SSD to Not Initialize Correctly?
Several potential factors can result in an SSD not initializing properly –
New SSD Needing Initial OS Communication
Brand-new solid-state drives right out of the packaging will always require initialization before functionality. The OS scans the drive to determine capacity limits, partitioning alignment, bad sector locations, interface speeds, and more.
Corrupted System or Partition Table Data
The partition table and master boot record (MBR) store vital reference data on SSD geometry, partitions, and operating communication syntax. If corrupted or damaged, the OS loses necessary initialization data.
Faulty Connections and Component Failures
Loose SATA interfaces between SSD and motherboard, faulty interface cables, or hardware issues with either device could lead to unsuccessful initialization routines and drive unrecognition.
Incorrect BIOS Settings or Outdated Firmware
A motherboard BIOS possessing outdated code, drivers, standards support, or an incorrect configuration could easily prevent proper SSD initialization and functionality.
OS File System Incompatibility or Mismatched Drivers
Initializing modern SSD designs requires a compatible operating system understanding of underlying flash-based technology instead of HDD magnetic platters. For example, Windows XP or Vista lacks native drivers for current SSDs without updating to the required drivers.
Now that we understand potential causation sources, structured troubleshooting is needed to identify the specific reason for SSD failure and the solution options available…
Step-by-Step Troubleshooting for SSD Initialization Problems
When an SSD refuses to initialize correctly, methodically work through these structured troubleshooting steps to zero in on the underlying reason –
1. Verify Secure Connections and Cables
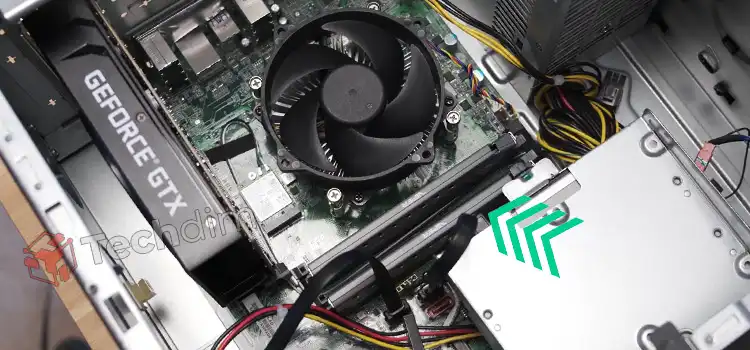
Carefully check all cabling between SSD and motherboard ports for a snug fit, examining the SATA data and power interfaces. Wiggling cables marginally; any detectable movement indicates loose insertion needing adjustment. If possible, swap cables and ports temporarily trying different hardware combinations. Faulty cables are a prime suspect in initialization failures and component connections absolutely must be snug.

Source: pcworld
2. Confirm SSD Detection Within Computer BIOS
Enter motherboard BIOS setup menus before operating system startup and check if SSD is listed on storage inventory pages. The BIOS operates at hardware levels below the OS, so detection here but not from within software points to an initialization routine failure or incompatible protocols instead of a fully defective drive unit.

3. Update Firmware, Drivers, and Resolve BIOS Settings
Having confirmed SSD detection by the BIOS already rules out some concerns, but outdated support software could still be the culprit. Update motherboard BIOS to the newest version along with integrated chipset drivers providing SSD data protocols. Double-check for any incorrect BIOS configurations like disabled AHCI mode or hot swapping. Enable any settings related to SSD support within reasonable adjustments.

Source: pcworld
4. Perform Disk Repair Processes Using CHKDSK or SCANDISK
An underlying storage issue like file system errors can block initialization too. Let the OS attempt disk repair processes designed to fix multiple issues automatically like master boot record problems, directory damage, and bad sectors. CHKDSK in Windows or SCANDISK on Mac provides broad correction abilities that may resolve many hidden initialization hurdles.

Source: appuals
With connectivity tests, component checking, and automated repair processes exhausted, we must move on to manual initialization next…
Manually Initializing the SSD Using Disk Management
With fundamental issues now eliminated through step-by-step verification and OS-based disk utilities, utilize the Windows Disk Management console or MacOS Disk Utility application to manually walk through drive initialization –
Initialize Using Windows Disk Management
Step 1: Right-click Start Menu and launch “Disk Management”
Step 3: Right click disk area labeled “Unknown”
Step 3: Choose the “Initialize Disk” option from the menu
Accept initialization wizard prompts
Disk Management will now scan the full disk, checking for issues before preparing structured communication with SSD hardware.
Initialize Using MacOS Disk Utility
Step 1: Open Finder Window > Select Applications > Double click Utility Folder > Launch Disk Utility
Step 2: Locate the Disk area labeled “Unknown” on the left pane
Step 3: Click the top menu option Initialize > Agreement Prompt
Step 4: Choose the desired format (APFS recommended)
For Mac systems, Apple’s Disk Utility follows nearly the same process as the initialize function to register SSD correctly.
If manual initialization attempts still fail, a 3rd party partitioning utility provides yet another approach…
Using Third-Party Tools to Initialize the SSD
For stubborn scenarios not resolved using built-in operating system tools, consider utilizing a dedicated partition management program instead for enhanced initialization capabilities –
Top Recommendations
- EaseUS Partition Master
- AOMEI Partition Assistant
- MiniTool Partition Wizard
These specialized applications are designed for handling disk and partitioning scenarios beyond typical OS abilities. Their focused initialization functions may succeed where generic routines fail by registering SSD capacity through alternative methods.
To initialize, generally follow this process:
Step 1: Download and launch the Partition Manager software
Step 2: Select the connected but unrecognized SSD disk
Step 3: Choose the “Initialize Disk” option from the top menu or right-click context choices
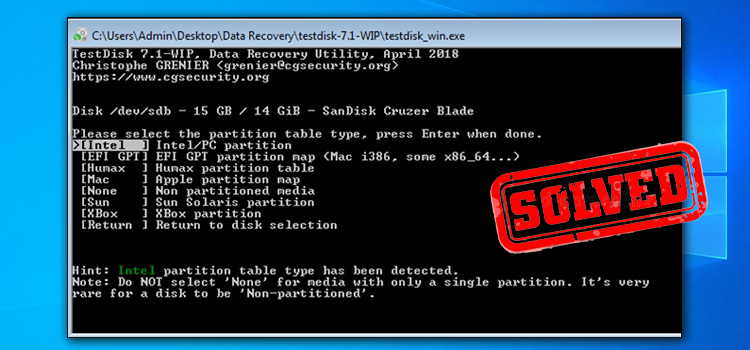
Step 4: Follow the wizard steps closely, choosing the initialization method
Allow completion then restart the computer
With powerful commercial functionality now leveraged, the SSD may initialize fully after the restart. If not, deeper challenges are indicated requiring additional troubleshooting steps next…
Extended Troubleshooting for Persistent SSD Initialization Failures
For the most difficult failures withstanding all initial troubleshooting and complete initialization attempts, extended diagnostics are necessary through systematic elimination of remaining possibilities –
Rebuild the Master Boot Record Sector Using Bootrec.exe
The master boot record stores critical data on partition definitions vital for normal functionality. Reconstruct this data from scratch using the Windows Bootrec.exe advanced recovery tool.
From the command prompt, run:
bootrec /RebuildBcd
Analyze the rebuilt data, refreshing OS understanding of disk geometries facilitating proper initialization handshaking.
Update HDD/SSD Controller and Associated Driver Software
While disk utilities focus on file systems and boot data, supporters like dedicated storage device controllers need current software maintenance too. Check vendor sites for controller chipset software updates. Also, update SATA drivers from within Windows Device Manager matching operating system protocols to the SSD.
Scan for Malware, Viruses, or File Conflicts
Harmful malware tampering with partition tables or boot records could certainly prevent SSD detection. Utilize malware removal tools to scan for viruses or conflicts from security software blocking access. Temporarily disabling anti-virus tools helps isolate any detection conflicts too.
Ensure Overall System and OS Support
Make certain overall computer specs like CPU, RAM, and BIOS revisions can fully support the SSD model as designed. Additionally, verify Windows or Mac OS versions have the necessary driver frameworks for interfacing properly. While exceeding the scope of this guide, lacking fundamentals here would explain initialization failures.
Contact Manufacturer Support Channels
As a final resort when internal troubleshooting cannot determine or resolve the root failure cause, engage SSD manufacturer technical support channels. Supply detailed debugging information gathered from previous steps during troubleshooting calls. Manufacturer engineers have extensive case history databases to pinpoint exotic failures and recommend replacement options if unrecoverable.
With exhaustive troubleshooting applied through multiple tools and methods, the specific culprit preventing initialization should be revealed. We can now move forward to the final process of preparing storage…
Partitioning, Formatting, and Migrating Data to the SSD
Upon finally achieving success with SSD initialization after exhaustive troubleshooting, complete these final steps –
Structuring the Storage Capacity
Use the Disk Management console to define distinct storage partitions on the newly accessible SSD capacity. Typical recommendations are creating a large primary partition utilizing most capacity for data needs, leaving the remainder for a small recovery partition as a cushion.
Determine appropriate partition sizes based on the total SSD capacity obtained and personal storage requirements. Assign logical drive letters like E: F: G: etcetera for simple access going forward.
Writing The File System Foundation
Next, choose a file system to build the frameworks for saving files and folders efficiently on the initialized SSD. Common selections are NTFS or exFAT for modern Windows environments. macOS best practices are APFS or even FAT32 for cross-platform SSDs.
Format the partitioned capacity through Utilities or Disk Manager console to commit the desired file system across the SSD hardware. Without this format process, storage partitions remain unusable for practical data needs.
Migrating Data from Old Drives
With fresh partitions now formatted with a file system, migrate personal data off existing drives into the SSD for improved performance. Transfer selectively based on performance-centric priorities. For example, Windows and Program Files see dramatic launches when stored locally on SSD rather than mere media files still working fine on HDD storage.
Use file copy/paste functions for migration or specialized apps like Samsung Data Migration software that automates full volume and partitioning transfers to new SSD installations with no reinstallation required.
Final Business: Can Lost Data be Recovered?
Through exhaustive troubleshooting, we can definitively recover the functionality of an unresponsive SSD using appropriate steps. But can important original data thought lost still be retrieved if backups are missing after drive failures?
Potentially yes in some cases! Data recovery software like EaseUS, Stellar, or DiskDrill can scan raw partition data before reformatting to recover previous files. This is only possible if new data has not yet overwritten the original files at the lowest levels.
Always maintain backups of precious data instead of relying on recovery tools. But they provide one last resort when troubleshooting goes awry critically damaging partitions before restoration.
End Note
Troubleshooting an unknown SSD begins methodically through connectivity tests, firmware updates, automatic repair utilities, and finally manual initialization using multiple tools. Proper partitioning, formatting, and data migration complete the project for a fully functioning SSD once again. Rely on this extensive guide whenever an SSD fails to initialize correctly. Just work through structured steps eliminating each potential failure point until discover the specific issue preventing detection for your unique situation.
FAQs
Can an SSD work correctly if not initialized when first installed?
No. The operating system lacks critical interface protocols without initialization. Data storage abilities remain unavailable until completed.
How can malware or antivirus software cause initialization problems?
Malware tampering with partition tables or boot records could easily prevent OS communication with SSD. Likewise some security apps block access until adding exceptions.
What initialization options exist for Mac OS X systems?
Apple provides built-in Disk Utility applications with an initialization wizard. Or consider Drive Genius for enhanced initialization tools under Mac OS.
Why migrate data selectively versus complete system backups?
Full system images capture unnecessary data slowing transfers. Migrate priority data like Windows and Program Files for speed, leaving media low priority for later.
- What is an SSD and What Does "Not Initialized" Mean?
- Why Proper Initialization Is Vital for SSD Functionality?
- Symptoms of an SSD Not Initialized
- What Causes an SSD to Not Initialize Correctly?
- Step-by-Step Troubleshooting for SSD Initialization Problems
- Manually Initializing the SSD Using Disk Management
- Using Third-Party Tools to Initialize the SSD
- Extended Troubleshooting for Persistent SSD Initialization Failures
- Final Business: Can Lost Data be Recovered?
- End Note
- FAQs
Subscribe to our newsletter
& plug into
the world of technology


