How to Customize Logitech G602 Mouse (8 Step-By-Step Guide)
To customize your Logitech G602, download and install the Firmware Update and Logitech Gaming Software first. Open the software and play around with the settings to familiarize yourself with the mouse.
You can change the DPI, set profiles, change the key binds, etc through this handy software. If you want to know exactly how to do all these, then stick around as this article will show you the way.
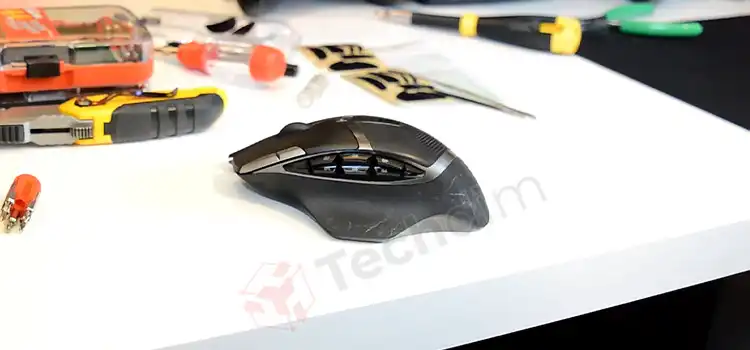
Guide to ‘How Do I Customize Logitech G602 Mouse’
Like every mouse with extra programmable control buttons, customization is something that you are bound to do sooner or later. Doing so helps you do your things more quickly, whether it is any shortcuts or in-game controls.
Step 1: Download the G602 Firmware Update
A firmware update is something that you will need for any kind of Logitech mouse. To download the update, go to the Logitech website. And search for “G602 Firmware Update” to download it.
Initiate the G602 Gaming Mouse Firmware Update and click on finish. The mouse will turn on and off intermittently to complete the update, so do not worry when that happens.

Step 2: Download the Logitech Gaming Software
The next thing to do is to download the Logitech gaming Software from the same website. This software is common for every Logitech mouse so you should have no trouble finding it. Select the bit of your operating system and hit download. The download should not take longer than a minute.
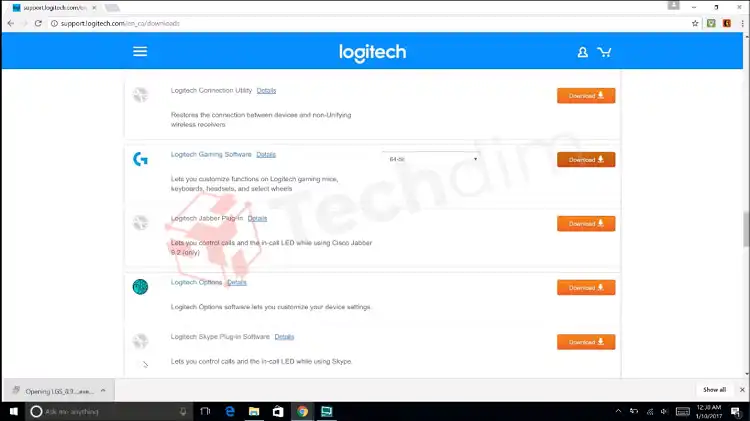
Step 3: Install the Logitech Gaming Software
Open the Logitech Gaming Software that you have just downloaded from your download directory and install it. It will take a couple of minutes at max. This software will allow your mouse to be optimized and more accessible, allowing you to taste a variety of features that come with the mouse.

Step 4: Configuring the Battery
After the installation of the Logitech Gaming Software, you will see a small yet neat user interface. The interface will have the image of the G602 with mouse buttons that are directly accessible and configurable.
On the top left side of the layout, you will see a battery icon where two modes can be set, Performance or Endurance. The Performance mode will give you service for about 240 hours with two batteries installed. As for the Endurance mode, this wireless mouse will last for about 1200+ hours with a single charge.

Step 5: Configuring the Profiles
On the right side of the interface, you will see “Automatic Gaming” where you can access the profile store or the manual settings of your mouse. You can configure different profiles for your automatic gaming or the onboard memory stored on the mouse.
If you do not understand any feature laid out in the interface, you can click on the question mark. It will take you to the Logitech website for potential solutions.

Step 6: Configuring the Mouse DPI
Clicking the mouse figure shown in the interface will take you to a small window. It will tell you what you can do to optimize the settings. If you click on the “Setting”, it will bring out a pointer setting feature. You can max out depending on your preferences by dragging the pointer or slider all the way to the right.
Maxing out the settings will drain more battery life. The maximum DPI you can reach with this mouse is 2500. You can also set the report rate there. It might take a while to understand the settings if you are new.

Step 7: Configuring the Mouse Buttons
The Logitech G602 mouse has 11 programmable buttons, making it a multifunctional mouse specifically made for gaming. Accessing the mouse image on the interface and clicking on a specific button there will take you to the command editor.
You can customize that part of the setting to dictate what purpose a specific button or key will serve. There are some default keys but you can also punch your very own key in there and customize it yourself.

Step 8: Setting Commands
The settings on the keys are relatively easy. For example, you can set a side button such as G8 of the mouse as Alt+F4 in the command editor. It does the function of closing the focused window. Hence, one click on that button will close the window.
Another example is setting your G9 key to the Ctrl+Alt+Del function. Clicking upon G9 will now show a slight flash from the mouse and then it will lead you to the lock screen of your computer.

How Do I Change My Logitech Mouse Settings
When someone mentions the mouse settings, DPI is one of the first things that comes to mind. Accessing the Logitech mouse settings and changing the DPI is pretty easy. Simply open the Logitech Software associated with your mouse and go to settings.
There, you will find a slider of the DPI icon. You can drag that slider to your preferred DPI. If you want to change the functions of the keys of the mouse, you can do that from the dedicated Logitech software as well.
How Do I Change the Keybinds on My Logitech G602
You can change the key binds on your Logitech G602 by downloading and installing the Logitech Gaming Software. In the software interface, go to the key that you desire to bind. You will see a KEY 1 column which you are supposed to leave as default.
Next to that, you will see the KEY 2 column. Click on that box and then again click the mouse button that you are eager to bind to that key. That is how you can change the key binds on your G602 gaming mouse.
Conclusion
Getting a new mouse and familiarizing yourself with it can be pretty entertaining. However, unless you have any prior experience, you are most likely to miss out on many features without even being able to know about them at all. Make sure to read the manual and treat your G602 gaming the right way.
Subscribe to our newsletter
& plug into
the world of technology
