How to Connect RGB Fans to Motherboard?
Your motherboard has to have one or more RGB headers for RGB fans to operate smoothly. Generally, RGB fans come with two types of connectors, one to control the RGB and the other for the fan motor.
So, you have to connect the RGB connector directly to the RGB header of your motherboard while directing the fan connector to the SYS_FAN slots.
However, it is possible to connect RGB fans to motherboards that don’t have dedicated RGB headers. But in that case, you will have to buy an RGB controller and a splitter cable separately. Once you have those, the regular fan slots on your mobo will get the job done.

Does My Motherboard Support RGB Fan?
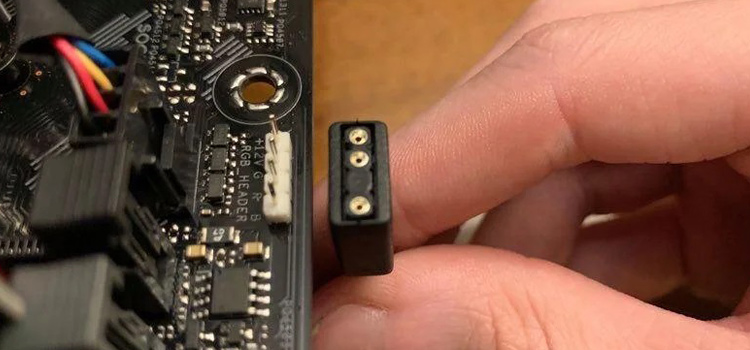
The user manual that came along with your motherboard will probably tell whether or not there’s support for RGB fans. But if it does not, a visual inspection is always a good place to start. Generally, your motherboard will have RGB headers labeled as RGB_Header1, RGB_Header2, or JRGB 1, JRGB 2.
Regardless of the labeling, the RGB headers usually sit at the edge of the motherboard. While most entry-level and mid-tier motherboards come with one or two RGB headers, high-end ones can have more.
How to Connect RGB Fans to Motherboard – 2 Steps
Connecting RGB fans to your motherboard is pretty convenient. However, the process requires you to have a good understanding of which slot does what. Still, if you follow these simple steps, you’ll get those beautiful RGB fans spinning in no time.
Step 1: First comes the easy part, opening up your computer case. If you haven’t done it before, you can take help from the user manual. Once the case is open, take the RGB fan and place it where you like, whether front or rear. Then, secure the fan using a screwdriver.
Even if you have decided to go with a 4-fan setup, one single RGB header will be sufficient. However, it will require additional purchases like an RGB wired controller and a splitter cable.
Luckily, some models like the MasterFan Pro 120 Air come with a controller pre-included. In that case, you don’t have to buy it separately. And for the RGB LED controller, it ships with pretty much every other model.
Step 2: Now that you have the fan in place, it is time to connect it. Generally, there should be two connectors coming out of the RGB fan. One of them is for controlling the RGB lights, whereas the other controls the rpm of the fan motor.
You can differentiate between the connectors by looking at their width, the wider 3-pin or 4-pin one being the RGB connector. Thus, once identified, connect it to the header labeled as RGB_Header or JRGB on your motherboard.
Apparently, the narrower 3-pin or 4-pin connector is there to help control the fan motor. Therefore, try to attach it to the fan socket on your motherboard, labeled as either CHA_FAN or SYS_FAN.

And that’s pretty much it. You now have your RGB fan installed and ready to spin. One thing to note here is your motherboard may not include multiple headers and fan sockets. In that case, you can connect the fans to the available 3-pin or 4-pin slots and check if they work.
How to Connect RGB Fans to Motherboard Without RGB Header?
You’ll need an RGB controller alongside a splitter cable for connecting multiple RGB fans to a motherboard that lacks an RGB header. Here’s how you can do it with three RGB fans.
First, mount the fans onto the computer case as per your setup of choice. Use the splitter cable to plug the RGB connectors into its female end.
Then, find the SYS_FAN sockets on the motherboard and plug the fan connectors into them. After that, connect the splitter’s remaining female connector to the controller.

Finally, attaching the controller to your computer’s PSU(Power Supply Unit) will get the RGB fans ready to roll.

Bottom Line
If your motherboard comes with RGB headers, all you have to do is connect the dots. But if they are missing, you can still connect the fans while the RGB lights cannot be controlled. So, for controlling the RGB, you must get a separate controller and splitter.
Subscribe to our newsletter
& plug into
the world of technology


