How to Copy a CD or DVD on Windows 10
With the development of modern and compact technologies, USB drives have become more familiar to people than the earlier disc drives. But still, it’s not like CD and DVD drives have just vanished in the air. You may still encounter situations where you need to rip or copy a CD or DVD to your desktop. Think if you find out the wedding DVD of your parents or your beloved old music CDs lying around!
Copying and pasting things from here to there is just a matter of a few seconds. But what if you can’t copy them using the quotidian copy-paste method? Well, a little bit of knowledge always proves to be handy in these abrupt situations. Let’s go ahead and see how to copy a CD or DVD on windows 10 in a few easy steps.
Process of Ripping a CD or DVD on Windows 10
Not always you can copy files simply from a CD or DVD as you do in the case of USB drives. This is because the CD and DVD are different from the hard drives or other removable drives in the way of storing files as they store data in raw digital format.
You will find audios with the “.cda” extension created by Windows CD driver on CDs and these files only represent locations. Or in some cases, they are Copywrite protected. To store these files, we need to convert or rip them into digital files like MP3, WMA, or WAV formats. Here we have piled up a couple of methods to rip files from a CD or DVD.
Using VLC Media Player
One of the most effective and straightforward methods is using the VLC media player as most of the users have VLC on their computers. Now, you may ask why we are choosing VLC over other media players. Well, VLC’s library allow you to play copyright protected or encrypted CDs. Sometimes, you will be able to copy them too.
Now, Let’s see how this works!
- Insert the DVD or CD drive that you want to copy on your desktop. For DVDs, make sure there is engraved or painted a “DVD” logo on the computer’s CD tray. The logo side of the disc should be facing up.
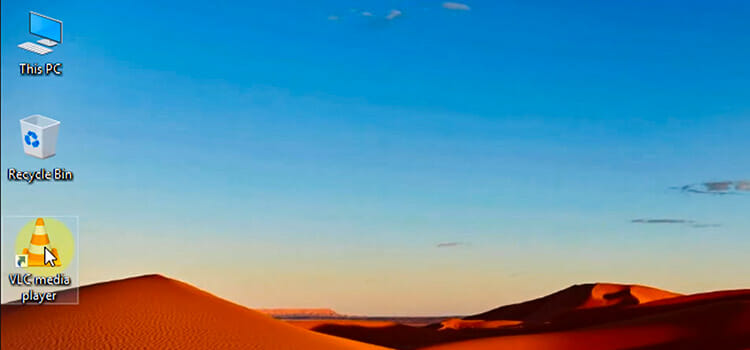
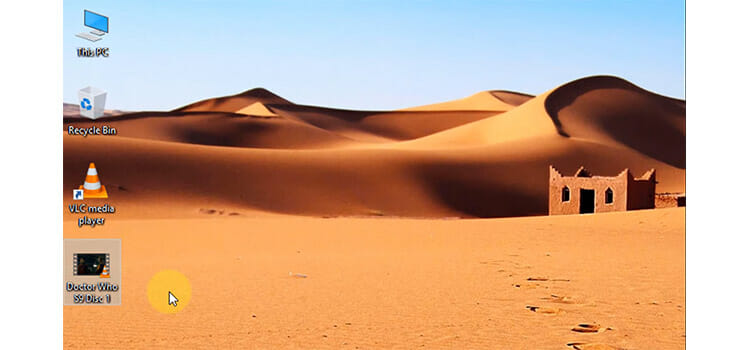
- Find and open the VLC media player from the desktop or start icon. If you don’t have installed it yet, download and install it first from the web browser.
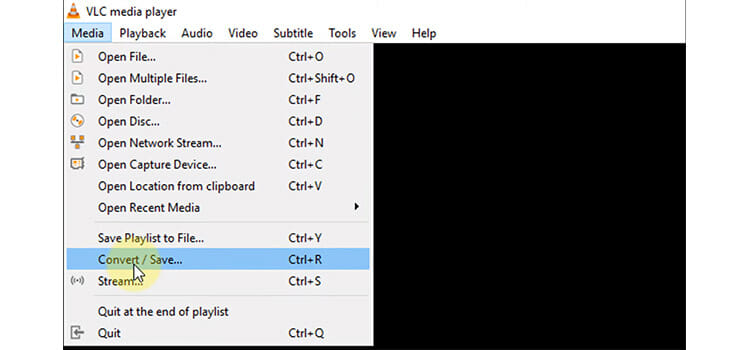
3. Under the top-left tab “Media”, select “Convert/Save…”. You can also use a keyboard shortcut of “Ctrl+R” to get to that page.
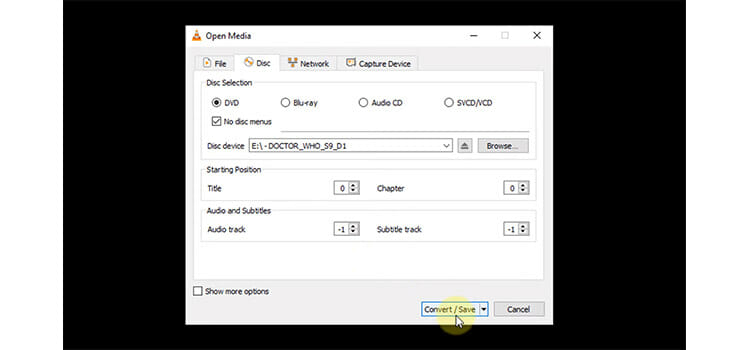
4. Now from the pop-up window, click on the “Disc” tab. Under this selection choose the “DVD” or “Audio CD” option. For this instance, I am copying a movie from a DVD so I will go for the DVD option. Enable the “No disc menus” option to avoid possible errors.
Then select the disc from the drop-down icon or simply browse it if you have multiple DVD’s inserted. You can also choose which title or chapter to copy under the starting position. Also, you can tweak in audio or subtitles option if you need. Now, press “Convert/Save” at the bottom right of the window.
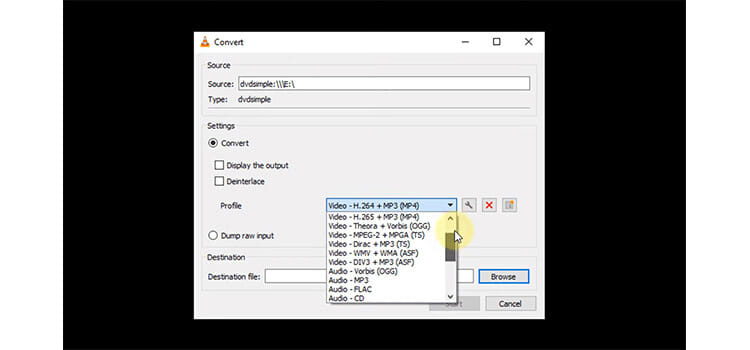
5. After you are done, another window will come on the screen. Here you can select the ripping codec to apply on the file under the “profile” option. Don’t choose anything random which will copy the file with an invalid format ending up all these works in vain. Here, “Video-H.264+MP3(MP4)“ is for videos, and “Audio-MP3” is for audio CDs.
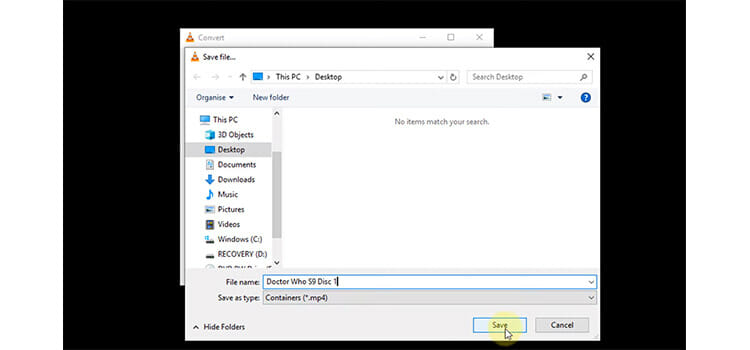
6. Now from the “Browse” button, you can predefine the desired destination and name for the file you are copying and click on “Save”.
7. After choosing the destination file, hit the “start” tab to start up the ripping process. It will take a while and you can check the progress from the progress bar at the bottom. It is not recommended to pause the process in the middle.
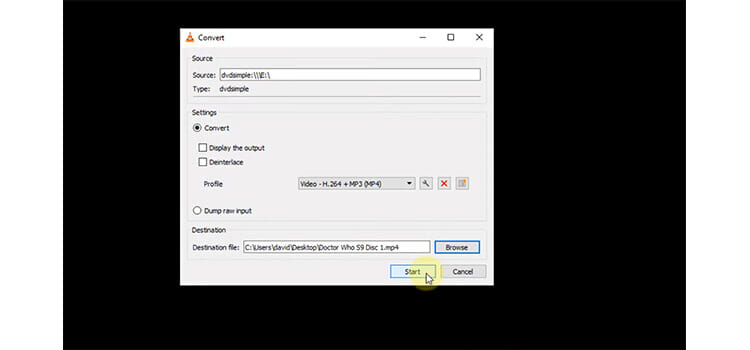
8. Once, you have done all these steps, browse to the destination folder where you saved the file and you will get all the files that you ripped. Now you can copy, move, send these ripped files as you normally do every day anywhere you desire.
Using Windows Media Player
Another way is using the Windows media player which enables you to copy files from any type of CD or DVD for free. Let’s see the steps.
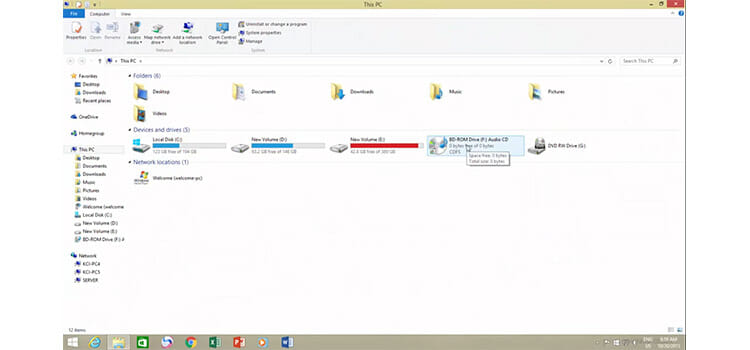
- Insert your CD or DVD like before and confirm this from the file explorer that the disc is ready to read.
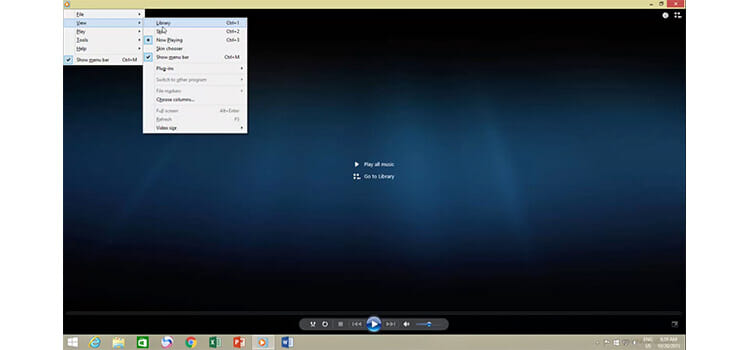
2. Find and open Windows Media Player. By default, it opens in now playing mode. Now press the “Alt” key from the keyboard which will bring the menu bar. After selecting the menu, select “view” and then further select “Library” from the options. Alternatively, you can go to the windows media player library by pressing “Ctrl+1” from the keyboard.
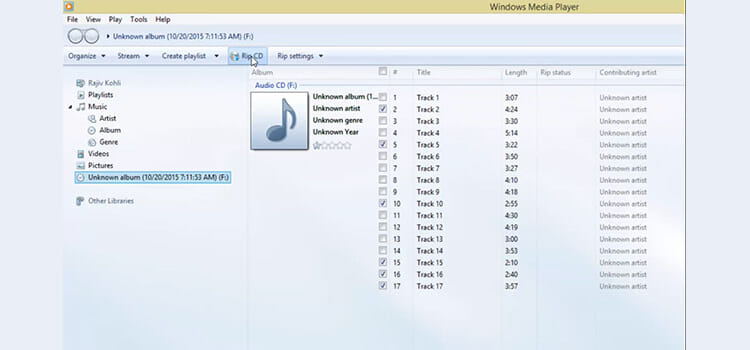
3. Now, from the left side panel, select your CD or DVD drive and you will see all the files on the right side. Then select the desired tracks you want to convert into digital files.
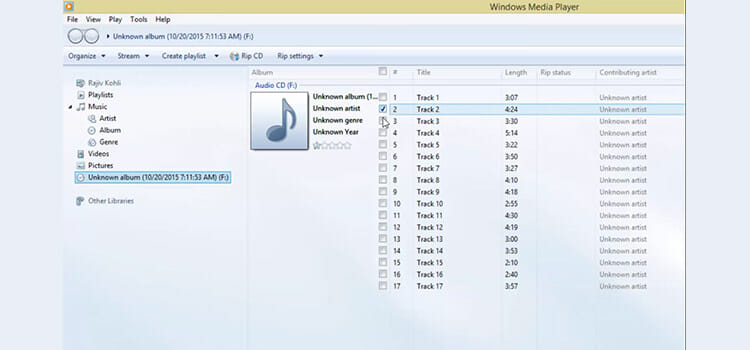
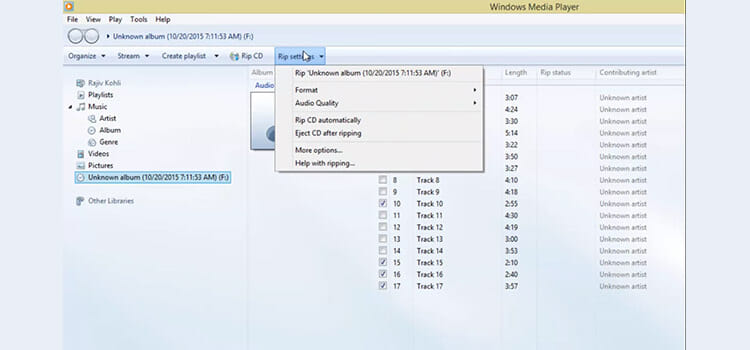
4. From the “Rip settings”, you can select the format and audio quality. Once you are done, press on the “Rip CD” to start the ripping process.
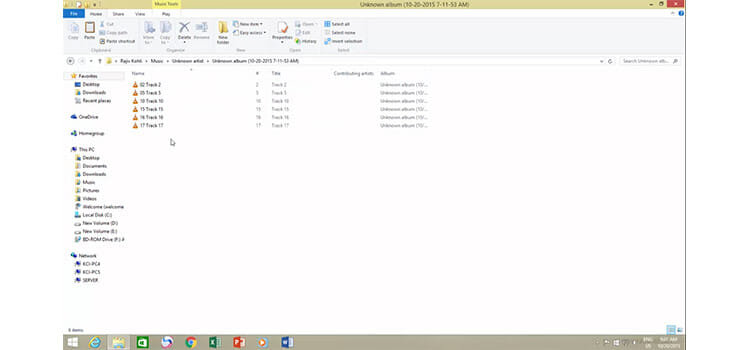
5. It will take a few moments. By default, the ripped files will be saved in the Music folder under the user profile folder.
Using IsoBuster
This one is helpful if the CD/DVD is copy-protected. If you open it from file explorer and find no data inside but see the CD is fully utilized from the properties, then the disc is copy-protected. You will also see a lock symbol on the icon. Here we will see how to crack the copy-protected files of a CD or DVD with IsoBuster.
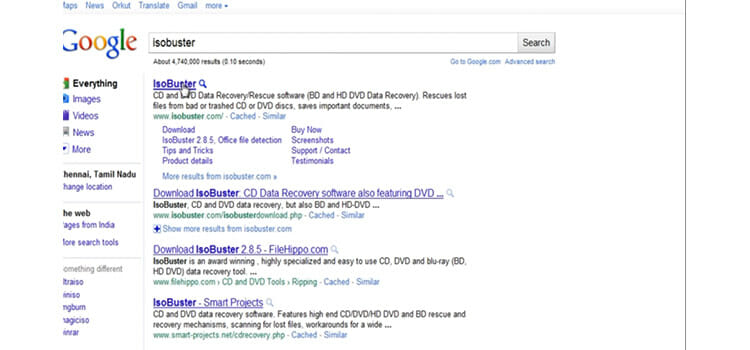
- Go to the internet browser and download and install IsoBuster on your computer.
2. Open the IsoBuster and then you will find all the copy-protected data in your CD that you couldn’t read earlier on normal CD/DVD drive.
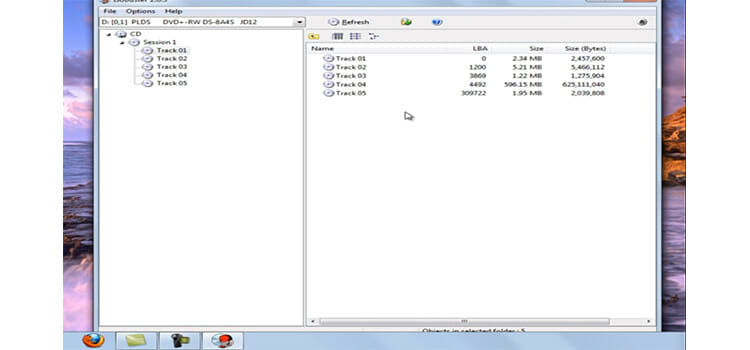
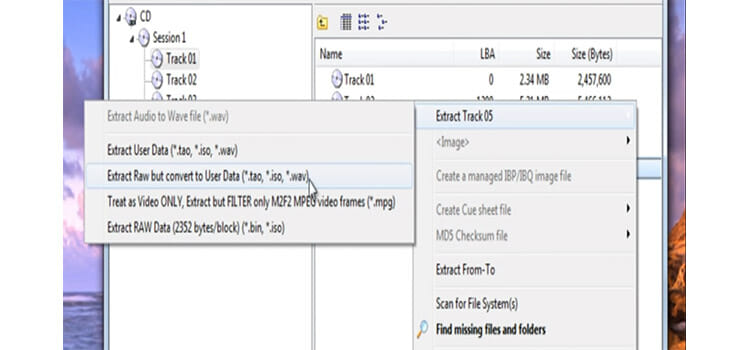
3. Now, extract the files from the CD. To do that right-click on the file. Then click on the extract and another menu will appear. If it is a video, select the fourth option. If it is an audio or any other type of file, select any other option other than the fourth. Then another window will appear after selecting the format. Here, you can define where you want the extracted files to be saved.
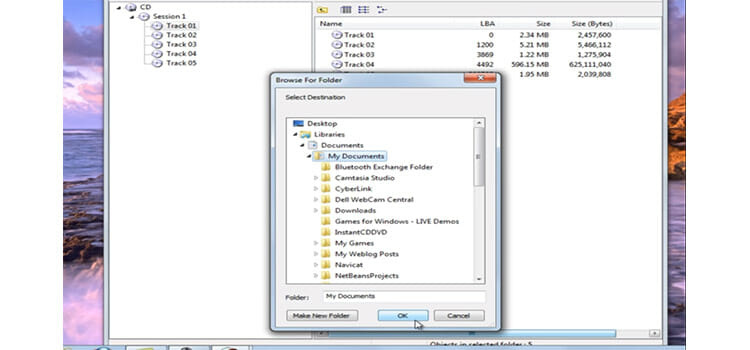
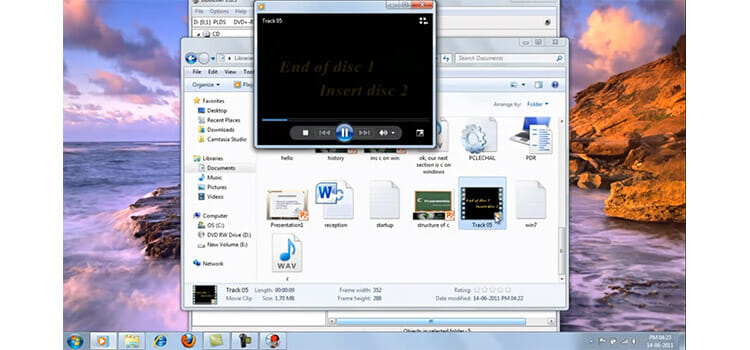
4. Finally, after the extracting is completed, the copy-protected file is cracked. You will find the files in the predefined destination.
Frequently Asked Questions
Does Windows 10 have CD copy/ripping software?
No, there is no dedicated CD copying/ripping software available in Windows 10. But you can use the built-in media player, Windows Media Player to ripping a CD. It has the necessary features to rip a CD.
Can I copy CD on Mac?
Yes, copying or ripping can be done on Mac. To do so, insert CD into optical drive > Finder > Go > Utilities > Disk Utility > from the right menu, choose disk name > New image. Now, copy and store any data from a CD.
Wrap Up
As the CD and DVDs get easily scratched and damaged, it’s a wise idea to copy the precious files on desktop for backup or using an external hard drive. In this article, we have discussed how to copy a CD or DVD on Windows 10 using a VLC player or a Windows Media Player with some easy-to-follow steps. If the files are copy-protected, then IsoBuster will cover your back.
We chose VLC and Windows Media Player as they are very straightforward, frequently used in computers, and free. There are few compromises you may have to trade-off when using VLC. Here, you cannot adjust the rip quality or exact format. Windows media player allows you to adjust the quality. So, back up your CDs and DVDs following these steps and rest assured.
Subscribe to our newsletter
& plug into
the world of technology

